Setting up Zapier integration & Zaps for Lead Ads
To populate the Facebook dashboard with data from Ads, you’ll have to either manually transfer the data or use our Zapier integration (recommended).
Setting up a new Zap to push Lead ads
Now you will need to create a new zap, in order to push the Lead ads into Dreamdata. This procedure has to be done for each individual lead ad
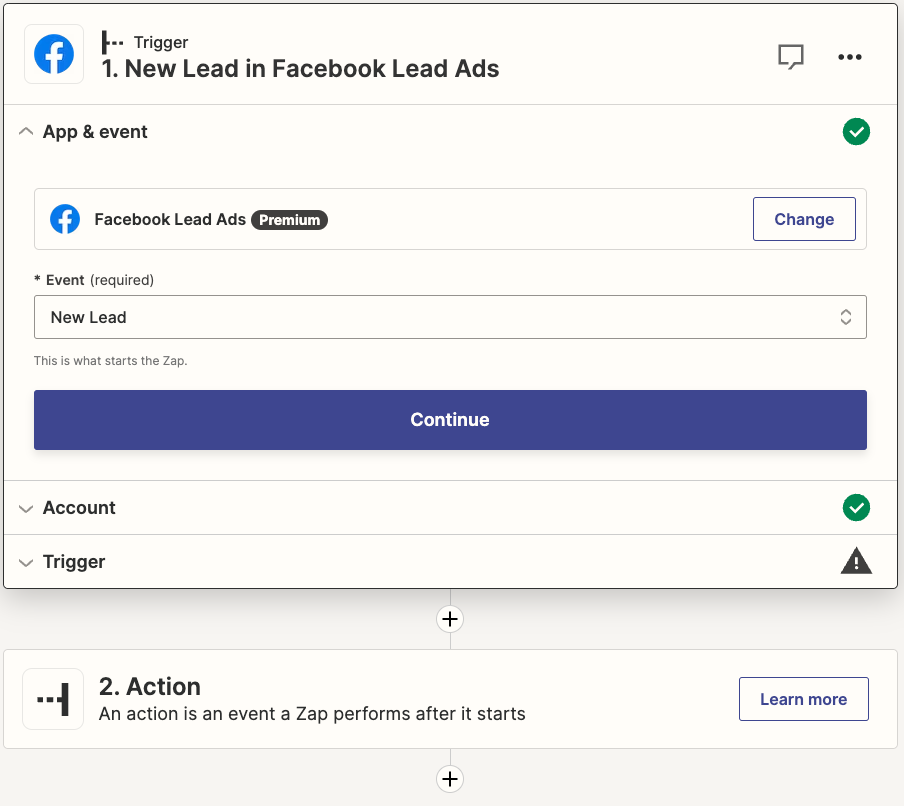
- Select desired app and event - in this example we will use Facebook Lead Ads
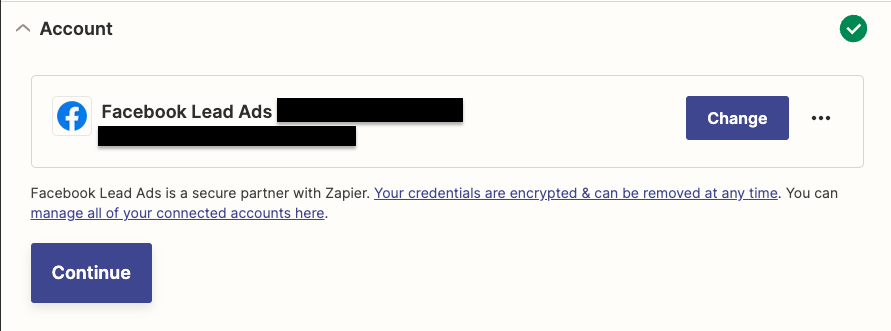
- Sign into your Facebook ad account
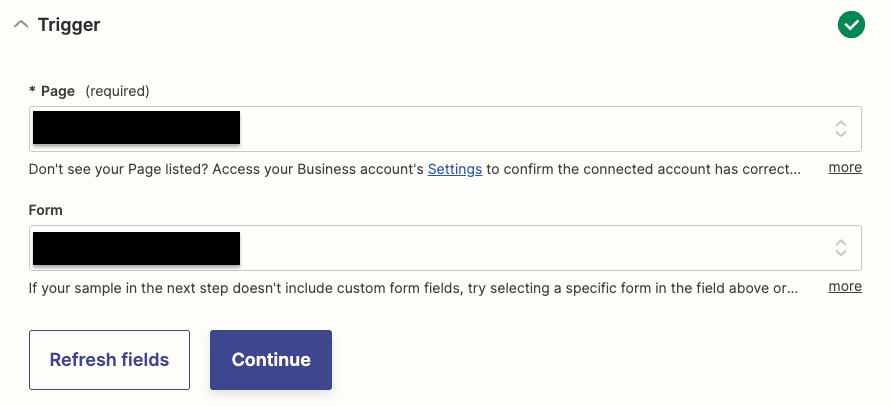
- Set up triggers with your chosen page and chosen form (you are unable to select multiple forms/ads, hence why multiple zaps need to be created)
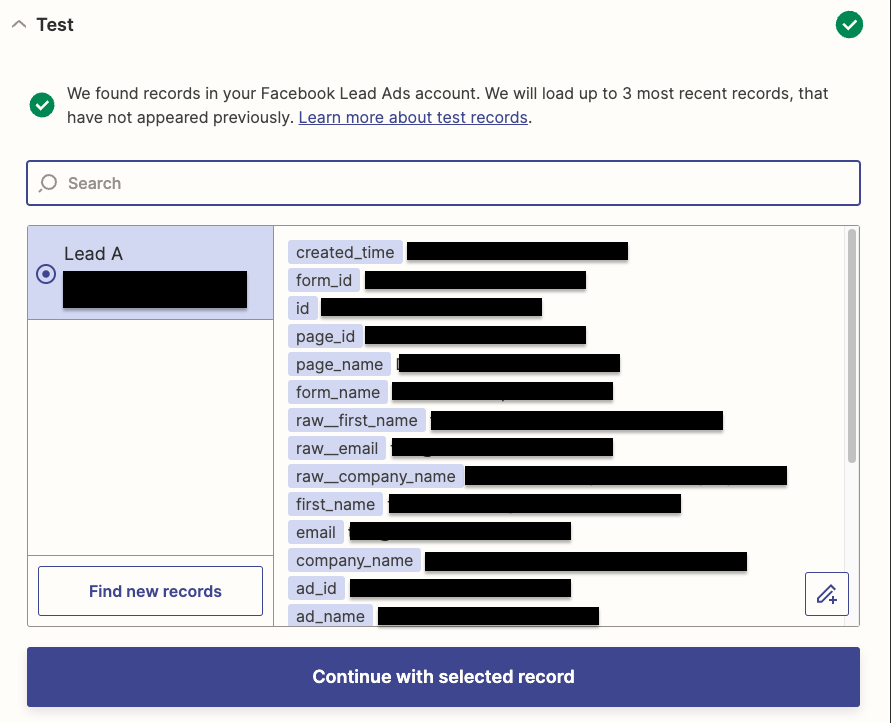
- Click “Test trigger”

- If your trigger and account are set up properly, it should return with a form response;
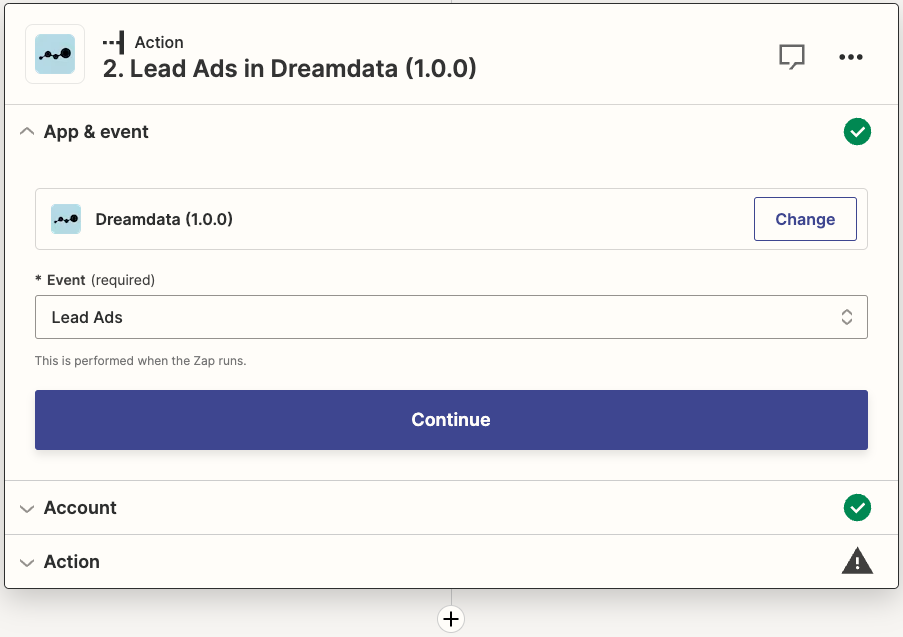
- Moving onto the Action setup, search and click “Dreamdata”, and in the event, select “Lead Ads”
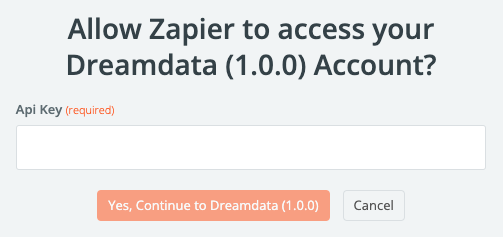
- Click “Sign in to Dreamdata” - a new tab will open, where you’ll have to add the API key as found below.
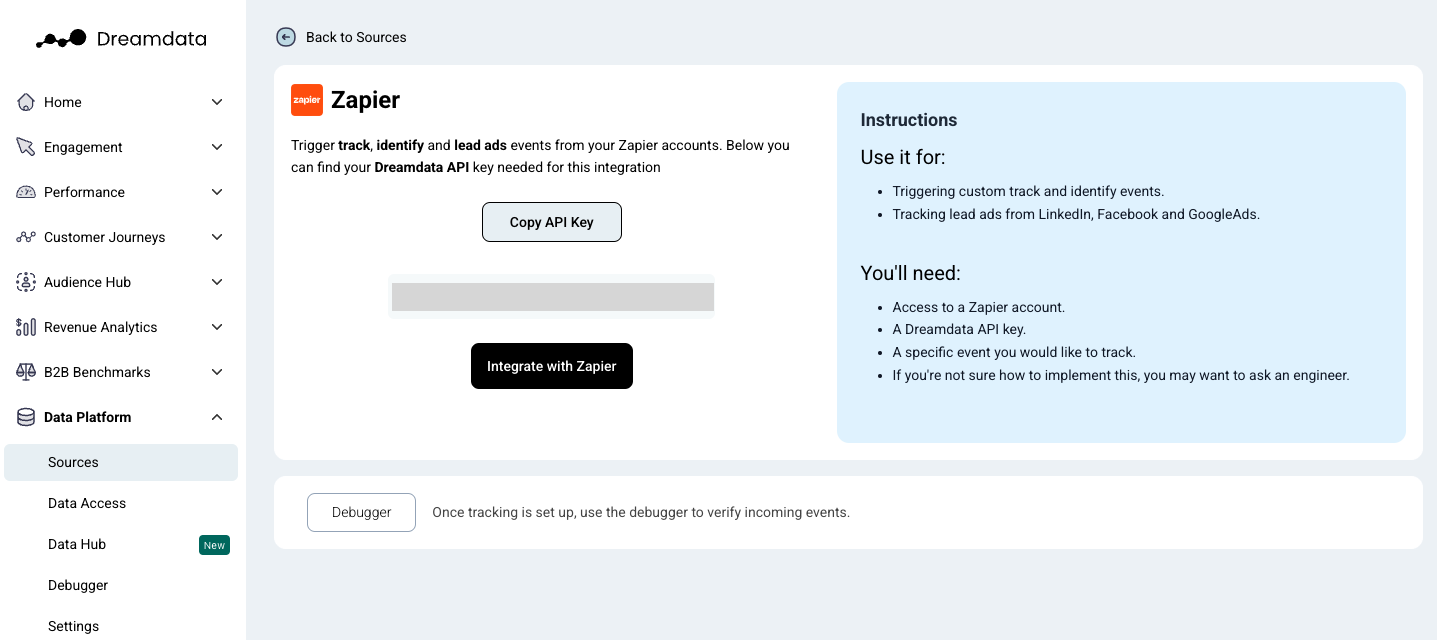
API Key can be found and copied in the Dreamdata app, under Data Platform → Sources → Zapier
- Now you’ll have to do some quick manual mapping:

Source: Facebook
Unique Source ID ID
Email: Email
Timestamp: Created Time
Campaign Name: Campaign Name
First name: First Name
Last name: Last Name
Title: Job title
Website: Page Name
Company: Company Name
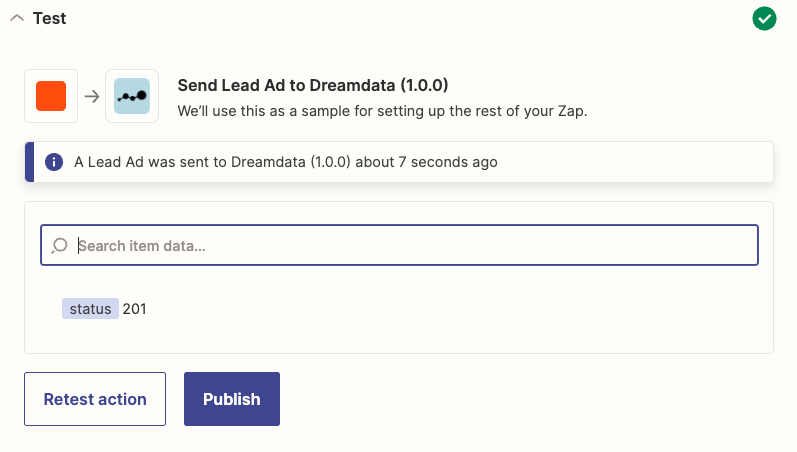
- After clicking continue, you will be able to “Skip test” or “Test action”
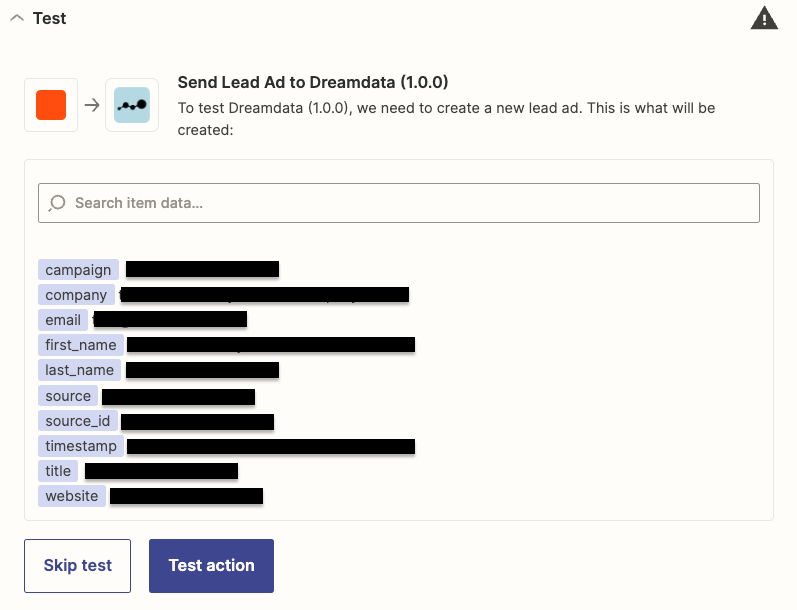
- After testing, if everything has been filled out correctly you would get a successful test. Status 201 means the request has been fulfilled. Finally click “Publish”
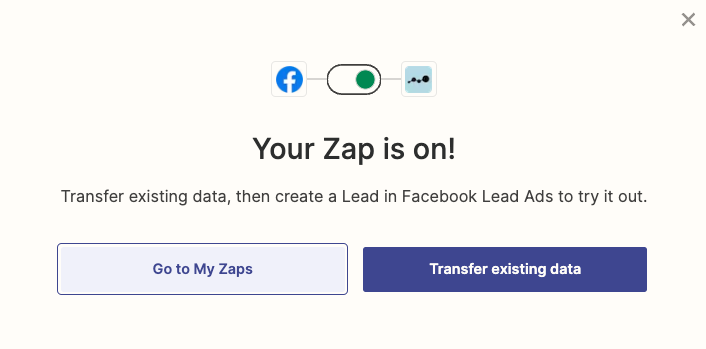
Your Zap will now start pushing data to Dreamdata. Repeat this process for all your lead forms/lead ads.
If you’d like to Dreamdata to show the historical data gathered with your lead ads/forms, you can follow this guide.