Google Ads Enhanced Conversion For Leads
- Why use Google Ads Enhanced Conversion For Leads?
- Set Up Google Ads Enhanced Conversions
- Cross-Account Conversion Tracking
- How to add a sync in Google Ads Enhanced Conversions?
- What data does Dreamdata send to Google Ads?
- How does Dreamdata send conversions to Google Ads?
- How does Dreamdata set attribution credit for conversions?
- How can I view the conversion actions Dreamdata Created on my Google Ads Platform?
- How can I view the conversion metrics related to Google Enhanced Conversions on Google Ads Platform?
- How can I compare the conversions and conversion value between Dreamdata and Google Ads?
- Why do conversions set through Dreamdata show Needs attention status?
- Troubleshoot
Google Ads Enhanced Conversion for Leads allows you to send anonymized customer data from Dreamdata directly to Google Ads. In this article we will explain how to set up the sync and detail the data flow between Dreamdata and Google Ads.
Why use Google Ads Enhanced Conversion For Leads?
Using Google Ads Enhanced Conversion for Leads can help you get a better understanding of the impact of your online advertising on conversions, which can lead to more effective campaigns and better ROI. Learn more about Google Ads API.
- You can get better ROI measurement: by combining Google Ads Enhanced Conversion for Leads and automated bid strategies, Google can help you optimize campaigns to generate more conversions at a lower cost. Learn more about automated bid strategies.
- You can improve campaign targeting: if you find that a particular ad or keyword is driving a lot of enhanced conversions, you can focus on refining the targeting and messaging with that knowledge for future campaigns.
Set Up Google Ads Enhanced Conversions
First, you will need to set up in your Google Ads account.
- Turn on auto tagging:
- Go to Google Ads account -> Admin -> Account Settings -> Auto-tagging -> check Tag the URL that people click through from my ad -> Click Save
- Check your permissions.
- Accept Google Ads customer data terms:
- Go to your Google Ads account -> Goals -> Conversions -> Settings -> Accept Customer Data Terms

- Enable Enhanced conversions for leads:
- Go to Google Ads account -> Goals -> Conversions -> Settings -> Enhanced conversions for leads

Cross-Account Conversion Tracking
If you enable Cross-Account Conversion Tracking on Google Ads and use a MCC account to manage conversions across all of your Google ads accounts, then you will need to add the enhanced conversion sync to your MCC accounts. Read more about cross-account conversion tracking.
- If you enabled Cross-Account Conversion Tracking in your MCC Google Ads account, but create a conversion sync to the child Google Ads account of that MCC.
- If you did not enable cross-account conversion tracking on Google Ads, but create a conversion sync to your MCC account.
How to add a sync in Google Ads Enhanced Conversions?
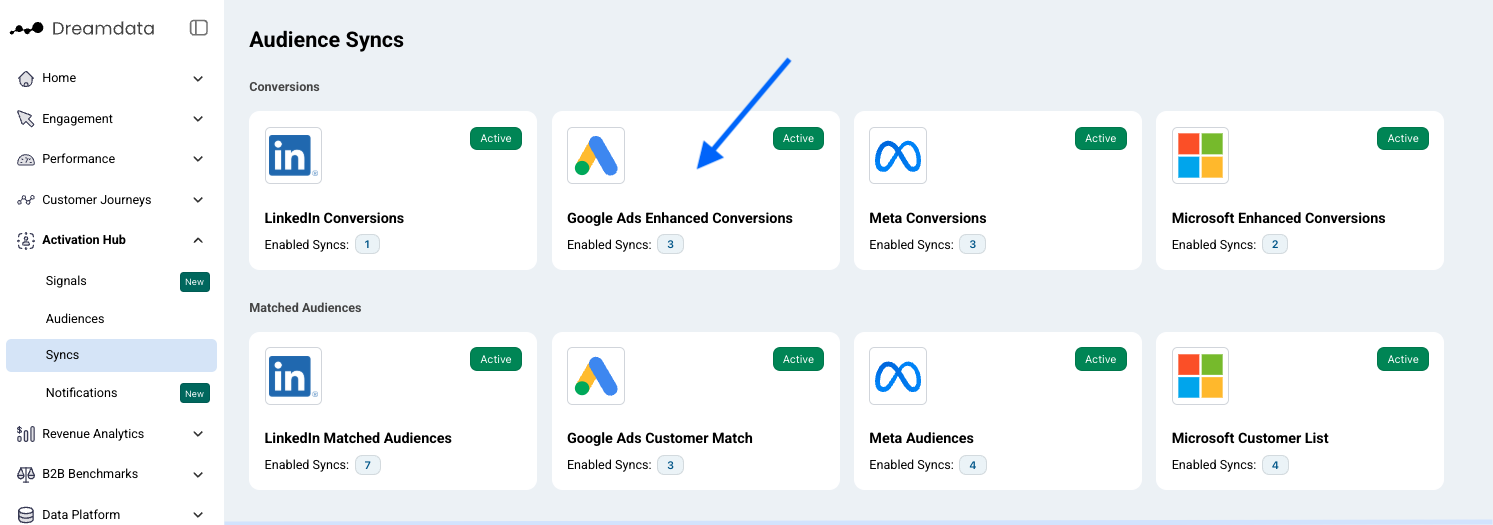
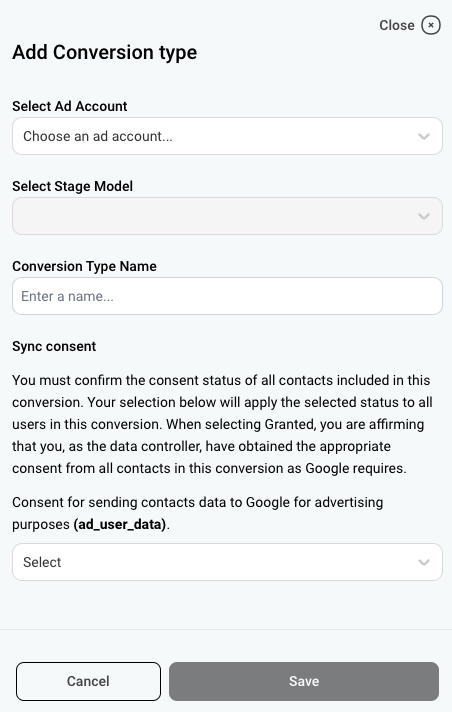
- Go to Activation Hub -> Syncs -> Google Ads Enhanced Conversions in Dreamdata.
- Connect your Google Ads account.
- Choose an account you want to send conversions to
- Choose a stage that you want to measure as an enhanced conversion
Read more about Google's consent policy here.
- Click Save, and you are all set.
What data does Dreamdata send to Google Ads?
After adding the sync, Dreamdata will send the following data to Google Ads (only for contacts for which we have at least one of the following: GCLID/GBRAID/WBRAID):
- GCLID - Learn more about it here.
If GCLID can't be found, it will send:
- GBRAID - Learn more about it here.
If GCLID and GBRAID can not be found, it will send:
- WBRAID - learn more about it here.
Moreover, we will send the following information hashed (anonymized):
- Email Addresses.
- Additional email addresses that can be found in your CRM.
- Phone numbers.
- Conversion Time.
- Conversion Value.
- Currency.
How does Dreamdata send conversions to Google Ads?
In this section we will use an example to explain the details of how Dreamdata sends conversions to Google Ads.
First, assume you set up an enhanced conversion for your Deal Closed Won stage. For Company A, there is one deal that reached this stage on 2024-09-20. The deal amount is 10,000 USD. We tracked three contacts involved in this deal's customer journey.
The following conversions will be sent to Google Ads:
Latest GCLID/GBRAID/WBRAID | Phone number | ConversionTime | Conversion Value | Conversion | Currency | |
Latest GCLID/GBRAID/WBRAID1 in deal journey (only if found in tracking data) | email1 | phone1 | 2024-09-20 | 10000 | 1 | USD |
Latest GCLID/GBRAID/WBRAID2 in deal journey (only if found in tracking data) | email2 | phone2 | 2024-09-20 | 10000 | 1 | USD |
Latest GCLID/GBRAID/WBRAID3 in deal journey (only if found in tracking data) | email3 | phone3 | 2024-09-20 | 10000 | 1 | USD |
This means that if all three contacts have interact with Google campaigns before the deal reached the Deal Closed Won stage, you will see three conversions in Google Ads but that actually represents one deal.
How does Dreamdata set attribution credit for conversions?
Dreamdata uses a Linear Attribution Model for Google Ads Enhanced Conversion data, this means that the value of a conversion is linearly split among all the Google Ad clicks.
Below we introduce an Example:
The following Customer Journey Timeline maps seven touchpoints for a single prospect over a 26-month period, tracking events from initial clicks to the final sales qualification.
Looking at the timeline, we see four events which are Google Ads Clicks (click Campaign A and B), each with a unique GCLID; the MQL and SQL represent the conversion events and the Phone Call an offline event.

For MQL conversion action, we send the following conversions:
GCLID/GBRAID/WBRAID | ConversionTime | Conversion Value | Currency | External Attribution Credit | External Attribution Model |
GCLID2 | 2022-03-01 | 30 | USD | 0.5 | Linear |
GCLID3 | 2022-03-01 | 30 | USD | 0.5 | Linear |
For SQL conversion action, we send the following conversions
GCLID/GBRAID/WBRAID | Conversion Time | Conversion Value | Currency | External Attribution Credit | External Attribution Model |
GCLID2 | 2022-03-05 | 100 | USD | 0.333 | Linear |
GCLID3 | 2022-03-05 | 100 | USD | 0.333 | Linear |
GCLID4 | 2022-03-05 | 100 | USD | 0.333 | Linear |
Why is GCLID1 not been sent to Google Ads? - Example
In the example above we don't see GCLID1 because the conversion window for an ad click is set to 90 days.
So only GCLID generated in recent 90 days will be sent as Google Enhanced Conversions.
How can I view the conversion actions Dreamdata Created on my Google Ads Platform?
- Go to Google Ads Platform -> Goals -> Conversions -> Summary -> Change time range to All time
If your Google Ads account received enhanced conversions from Dreamdata, you will see a change in the status column.
How can I view the conversion metrics related to Google Enhanced Conversions on Google Ads Platform?
- Go to View Google Ads Platform Campaigns
- Select Segment -> Conversions -> Conversion action
- Add the following columns:
- Conversions (by conv. time)
- Conv. value (by conv. time)
How can I compare the conversions and conversion value between Dreamdata and Google Ads?
You shouldn't expect an exact match between All conversion (by conv. time) metric in Google Ads and influenced deals metric in Dreamdata, due to multiple restrictions Google Ads set when uploading the enhanced conversion data. Learn more about the restrictions here.
But even if there isn't an exact match, conversion data can definitely send a strong signal to your Google Ad campaigns for ROI improvement.
Below you can find some of those restrictions:
- We are unaware of how Google Data-Driven attribution model is applied on the data we send to Google Ads
- 55 days adjustment window
- 90 days conversion windows
- recent 90 days conversions
- recent 90 days clicks
- GCLID generated outside the Google Network is not accepted by the conversion upload - Learn more about it here.
- Google is able to match Engaged View Conversion, which is not reflected in Dreamdata - Learn more about the Engaged View Conversion here.
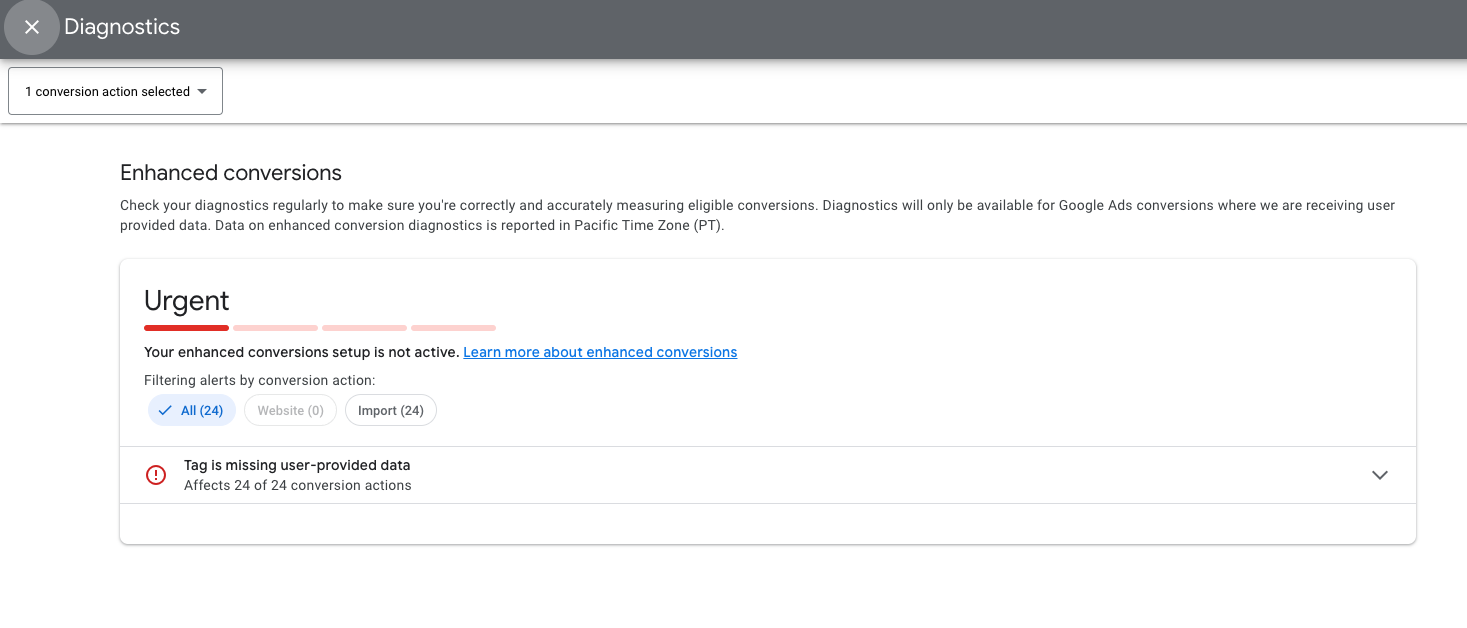
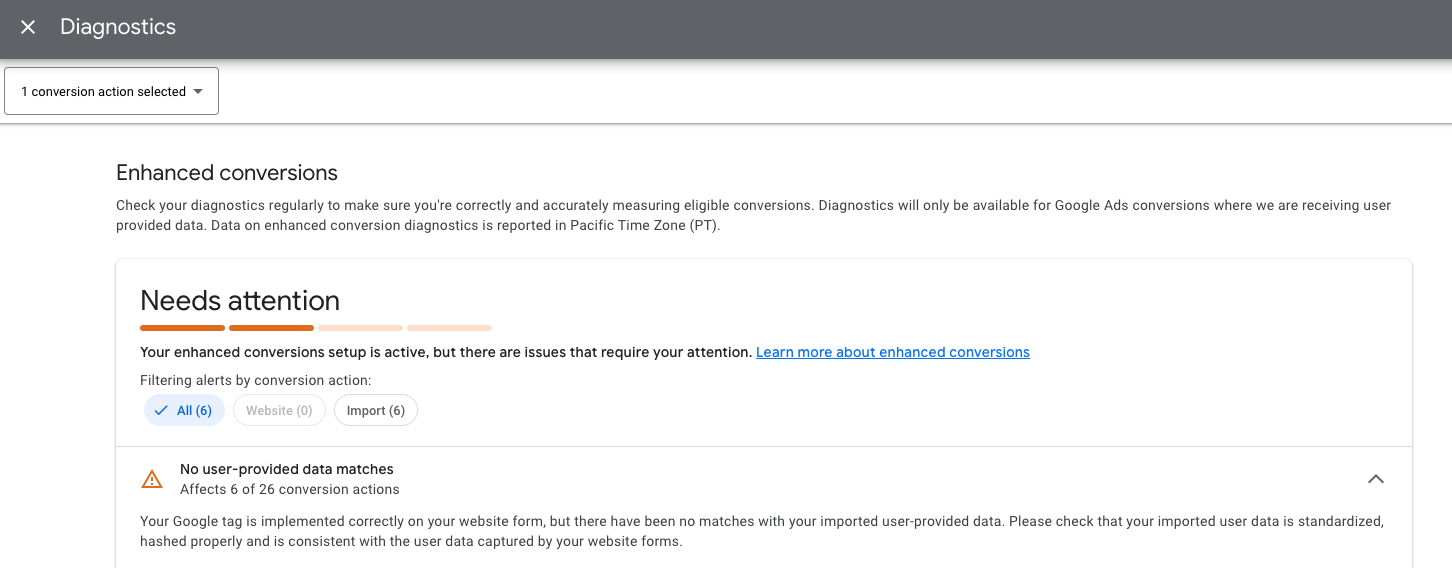
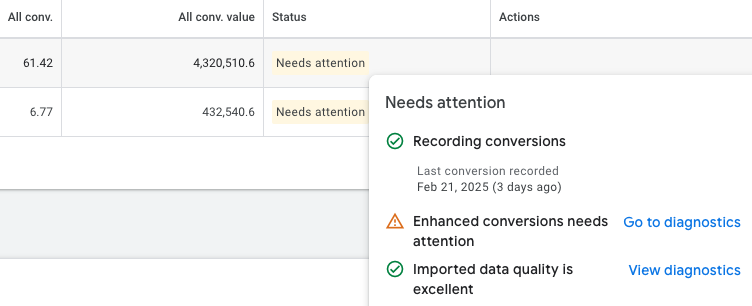
Why do conversions set through Dreamdata show Needs attention status?
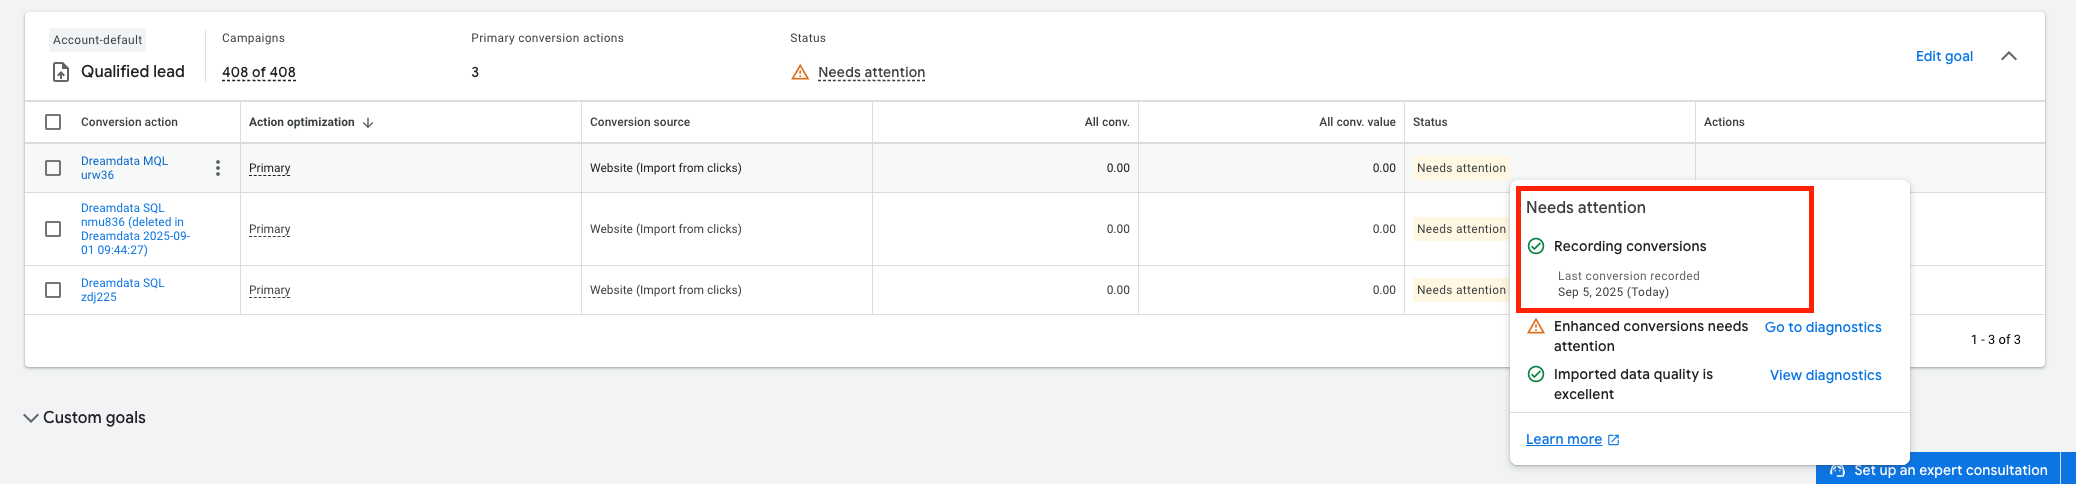
Understanding the "Tag is missing user-provided data" or "No user-provided data matches" Error
Even if you encounter the "Tag is missing user-provided data" or "No user-provided data matches" error, everything is still functioning correctly and conversions data is synced. This message means that the conversion data we uploaded to Google includes emails that weren't captured by the Google tag on your website's form, which is normal since not all contacts reaching a certain stage (for example: Deal Closed Won) submitted forms through your site.
How to confirm your data is flowing
Go to the Conversions Summary overview and check the All conversions and All conversions columns for each sync. If you want further details you can hover over the Status value and view diagnostics for the imported data.
How to avoid the "Tag is missing user-provided data" or "No user-provided data matches" Error
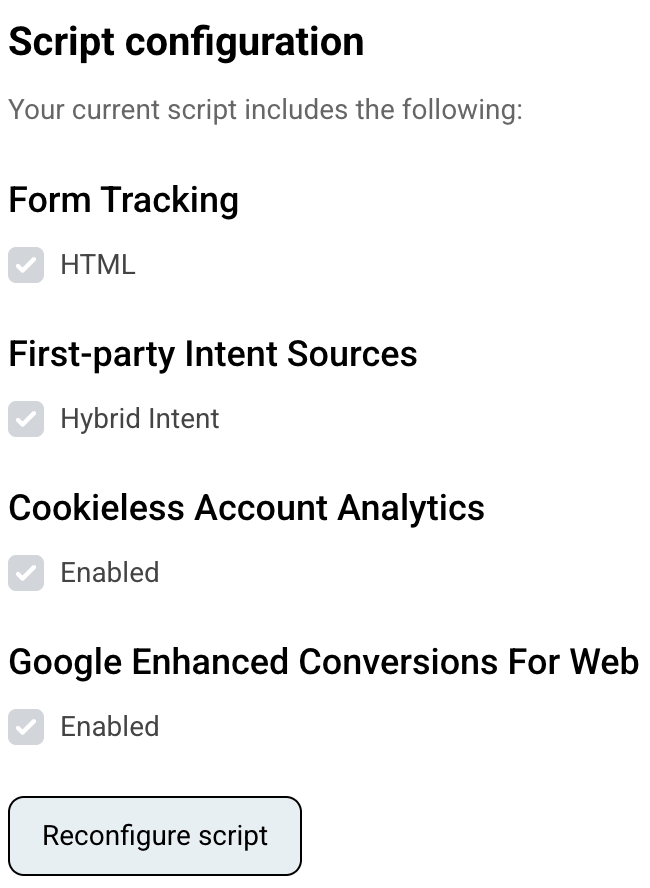
To decrease the chance of seeing the statuses mentioned above, turn on Google Enhanced Conversions For Web in the Dreamdata Analytics V2 tracking script. This will enable sending the hashed email address of someone that submits a form directly from Dreamdata's analytics script to Google, if Google Tag is set up on your website.
- If you are just setting up our Analytics V2 tracking script, turn Google Enhanced Conversions For Web on in the onboarding wizard
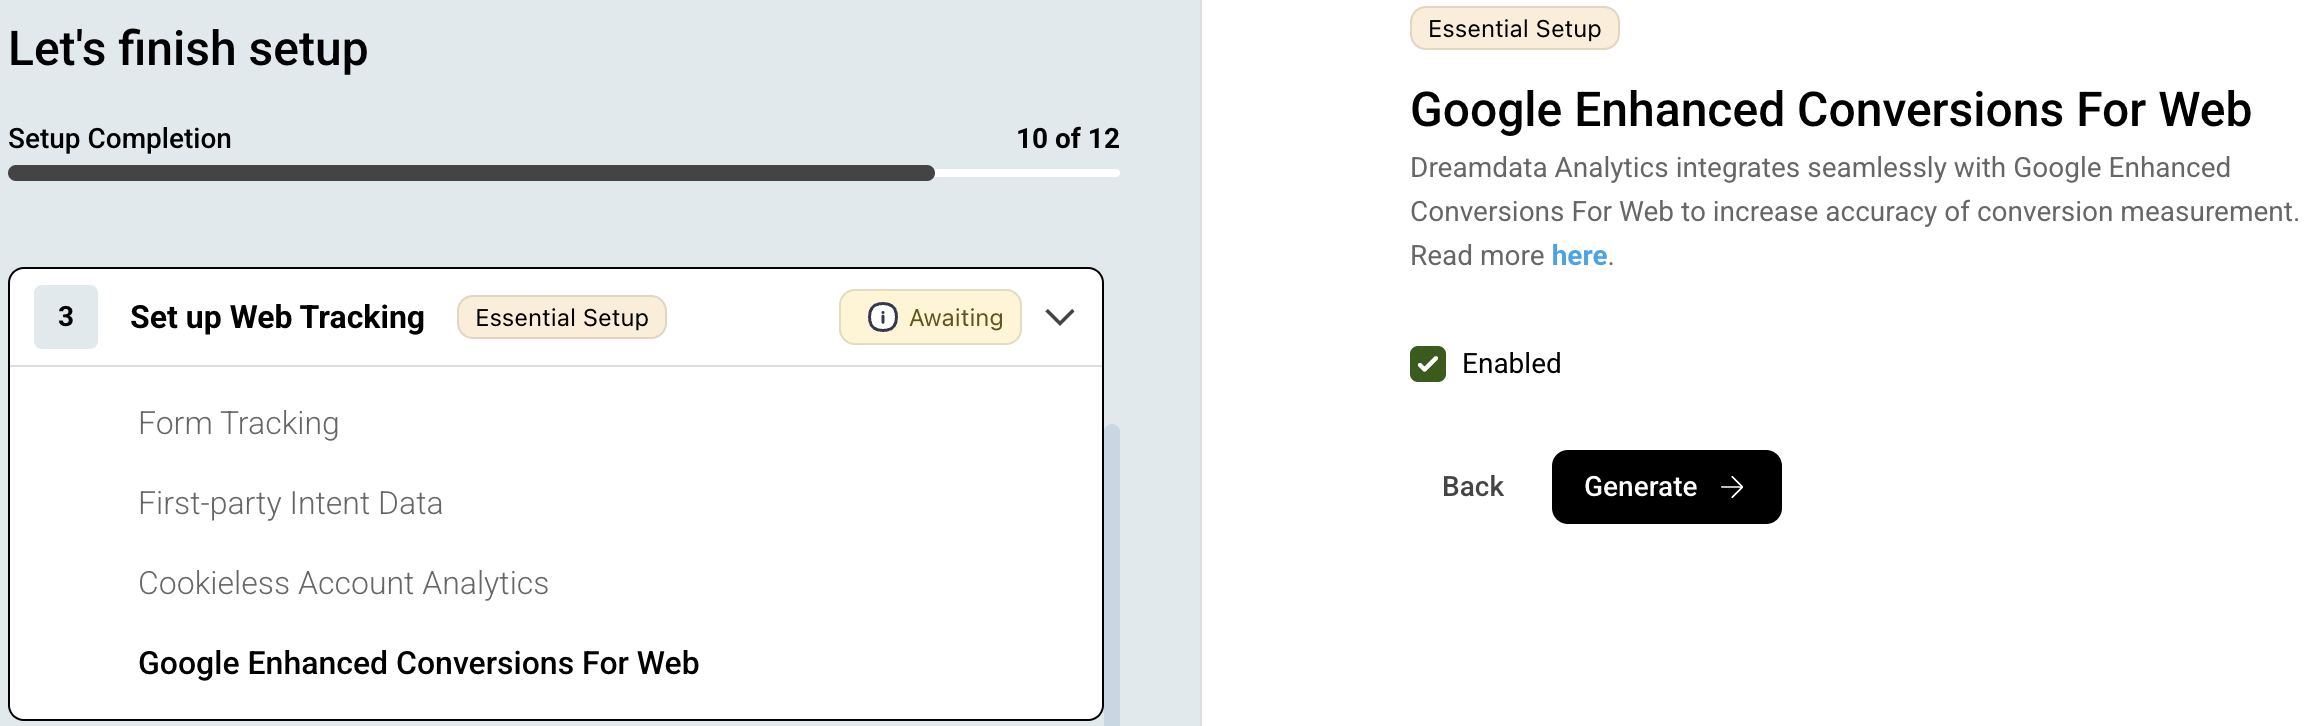
- If you already have set up our Analytics V2 tracking script, you can reconfigure the script to include Google Enhanced Conversions For Web
Troubleshoot
admin_policy_enforced Error
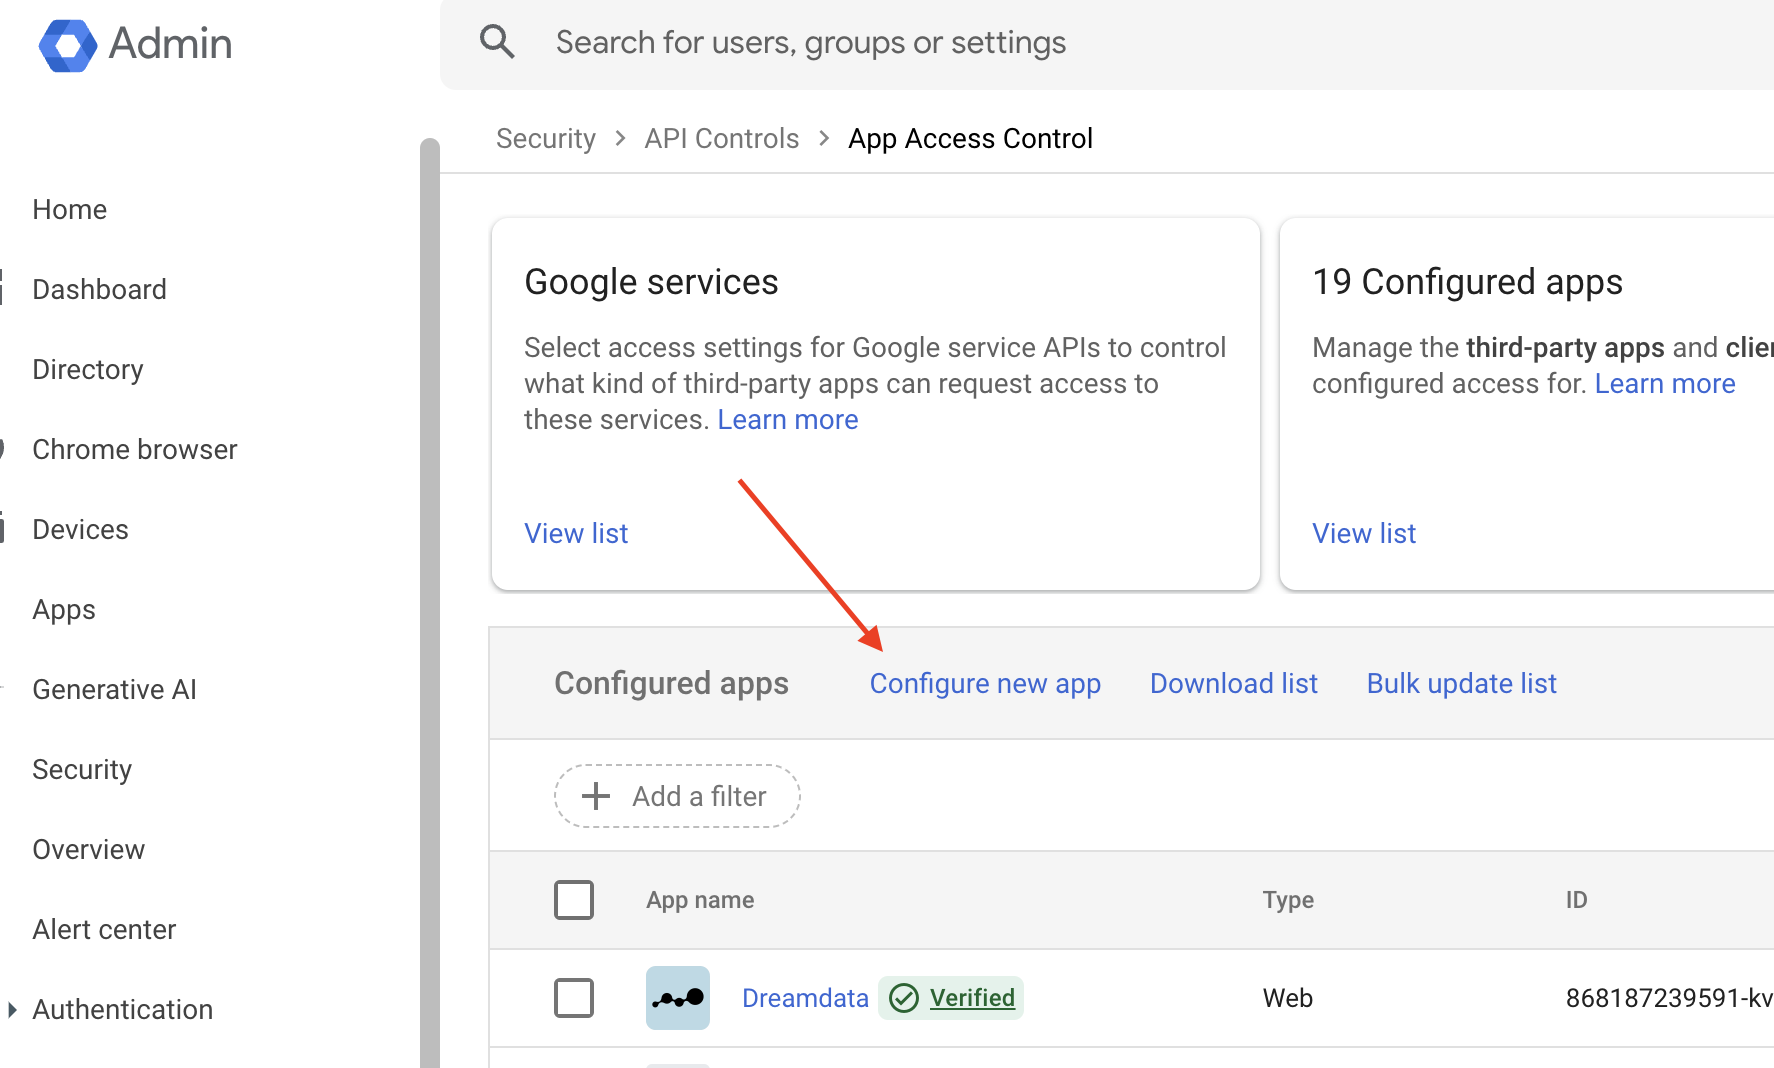
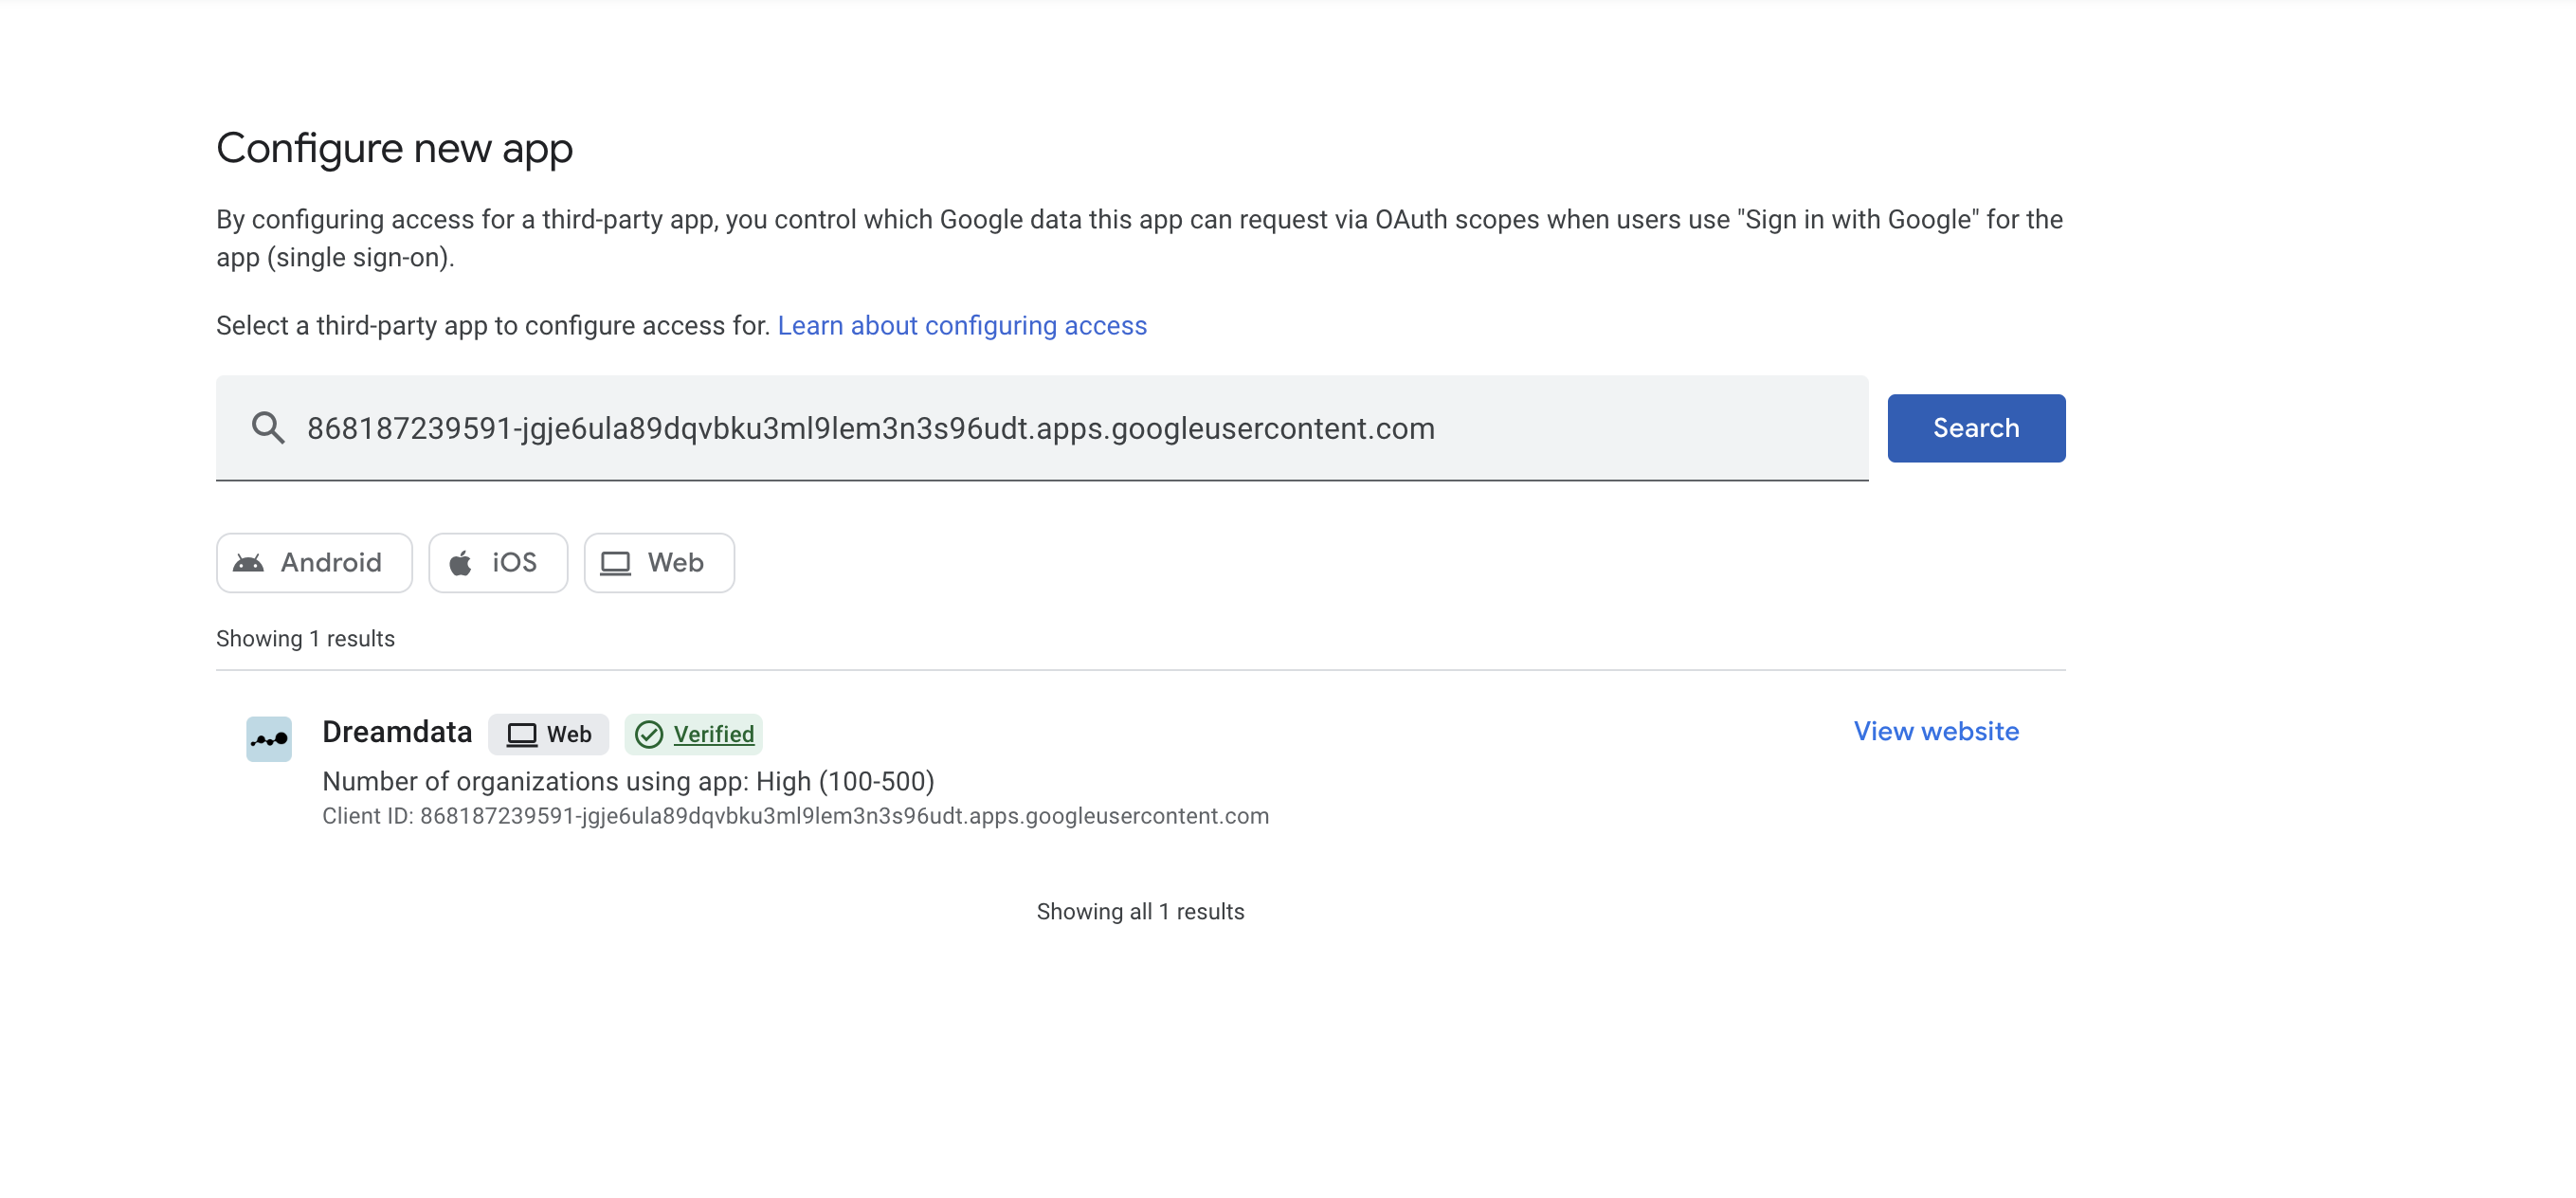
If you get an error that says “400 admin_policy_enforced” it means the administrator of your account doesn’t allow you to share some of your organization-specific data with the Dreamdata app.
To solve it, you need to reach out to your organization’s Google Workspace administrator and grant Dreamdata app (868187239591-85s42vftrlp1nejh7cj1cdsvjtn86gon.apps.googleusercontent.com) access based on this doc
Go to Security > Access and data control > API controls > MANAGE THIRD-PARTY APP ACCESS > Configure new app > search 868187239591-85s42vftrlp1nejh7cj1cdsvjtn86gon.apps.googleusercontent.com > grant access