How to set up stage models
 Updated
by
Anton Lauritsen
Updated
by
Anton Lauritsen
Outlined below you'll find a simple guide on how to set up your stage models. With this, you'll be able to start measuring your touch points and analyze what activities have led to a contact converting from one point to another.
Enjoy!
What is a stage model?
A stage model is a funnel goal, and is a way to showcase how activities performed by associated contacts and companies are connected before they reach a certain stage.
A stage model is a way for you to gain the full picture of what activities have led up to a given stage.
Step 1: Access the Stage Models
To get your stage models built out:
- Navigate to the Data Platform:
- Go to the "Data Platform" section in Dreamdata (located in the menu on the left side).
- Click on "Data Hub".
- Select Stage Models:
- Choose the "Stage Models" option.
Step 2: Create a New Stage Model
If you're building your first one the following steps are needed:
- Add a Stage Model:
- Click on "Add a Stage Model."
- Define a name, such as "MQL New."
- Define a Description:
- Provide a description, ie. "MQLs through HubSpot,".
- Pick a short name:
- Add a short name for these types of business activities. For example, if you're creating the MQL stage, choose it as a "Lead." This will be the name reflected when analyzing the stage model inside Dreamdata.
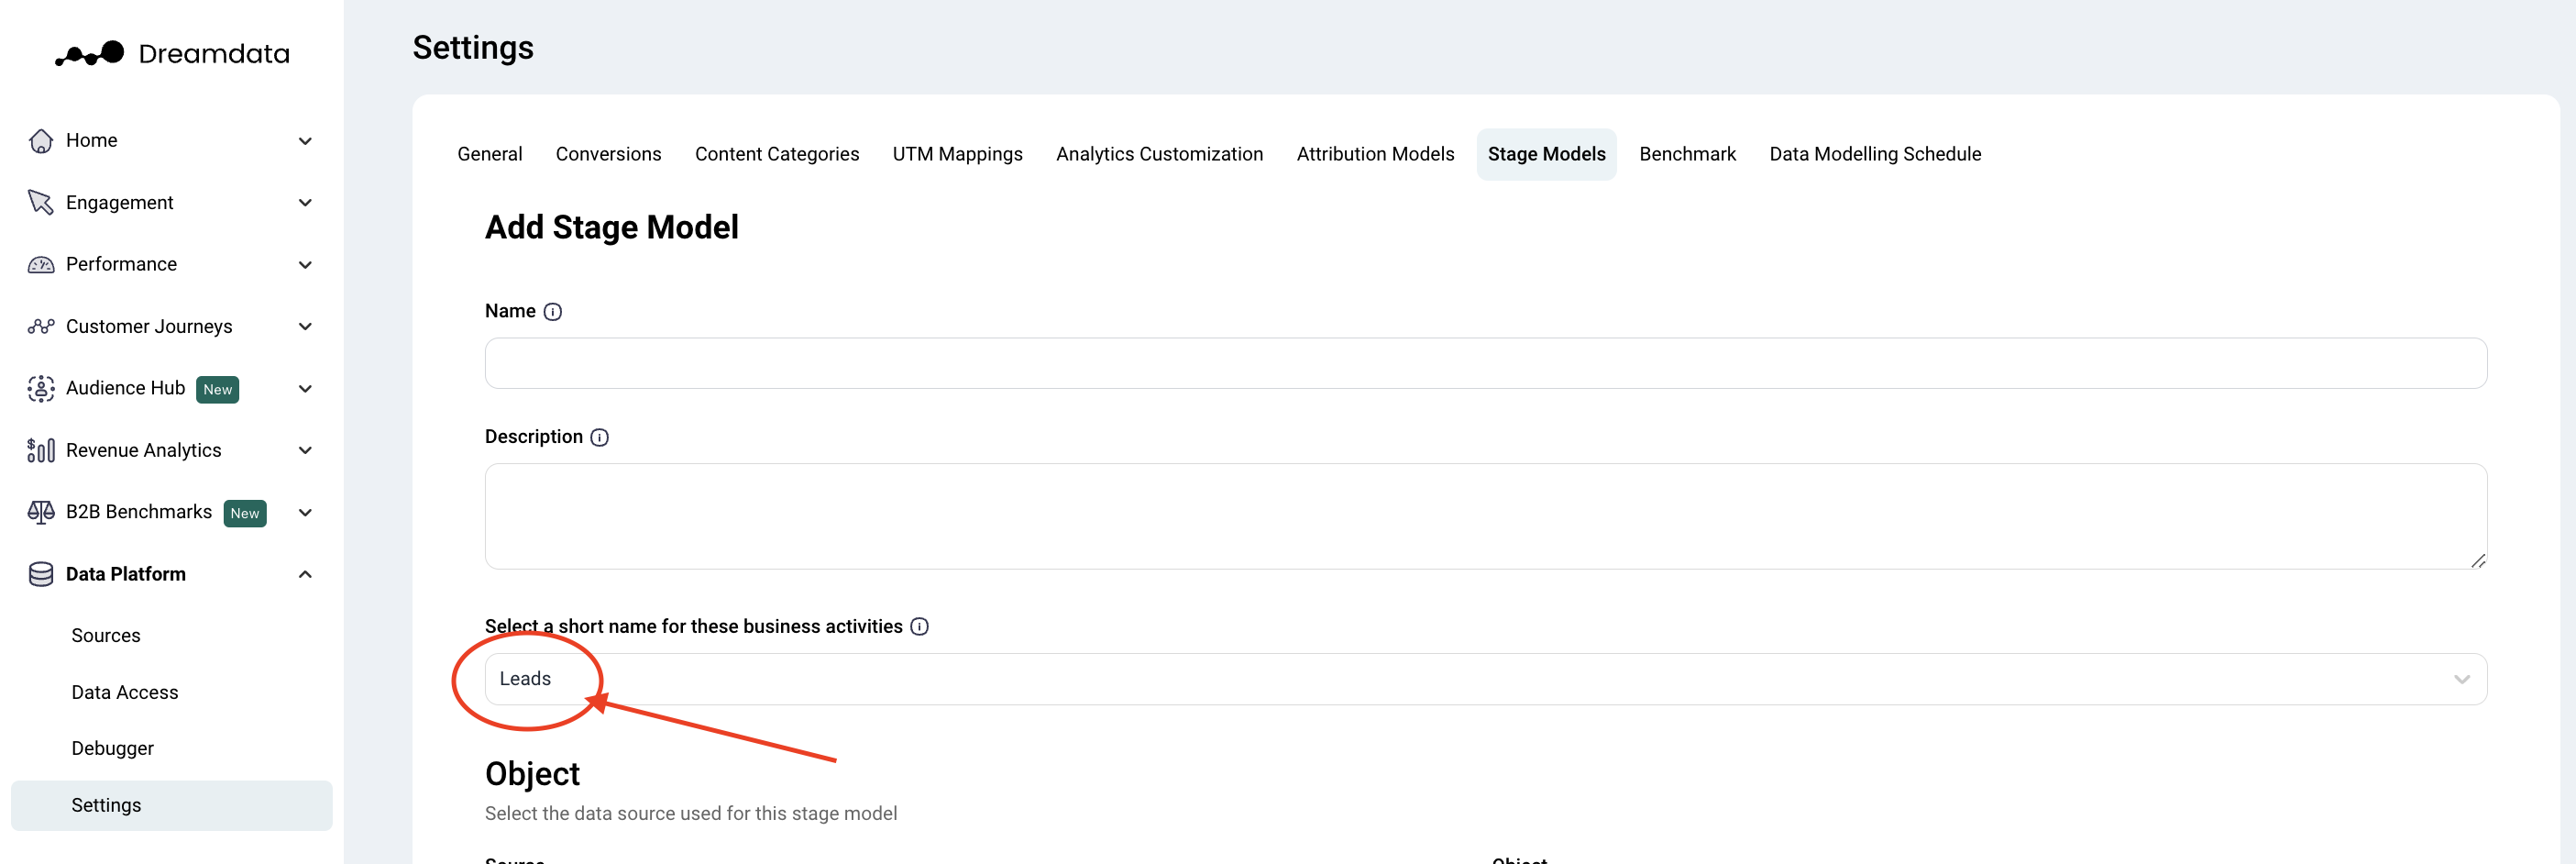
- Add a short name for these types of business activities. For example, if you're creating the MQL stage, choose it as a "Lead." This will be the name reflected when analyzing the stage model inside Dreamdata.
Step 3: Define Contacts and Stages
- part 1: Select your source:
- Event Stream
- CRM
- part 2: Choose object scope:
- Choose on which object the information is available on. For MQLs, it's usually on the contact or lead, for closed won it's usually on the opportunity or deal object.
- part 3: Decide entry count:
- Decide whether it's the first or every object you wish to count towards. I.e. if you were to count "deals" you could either choose every deal, the first or last deal for that company.
Tip: In order to define, what the stage model should count click the "Show additional options" button.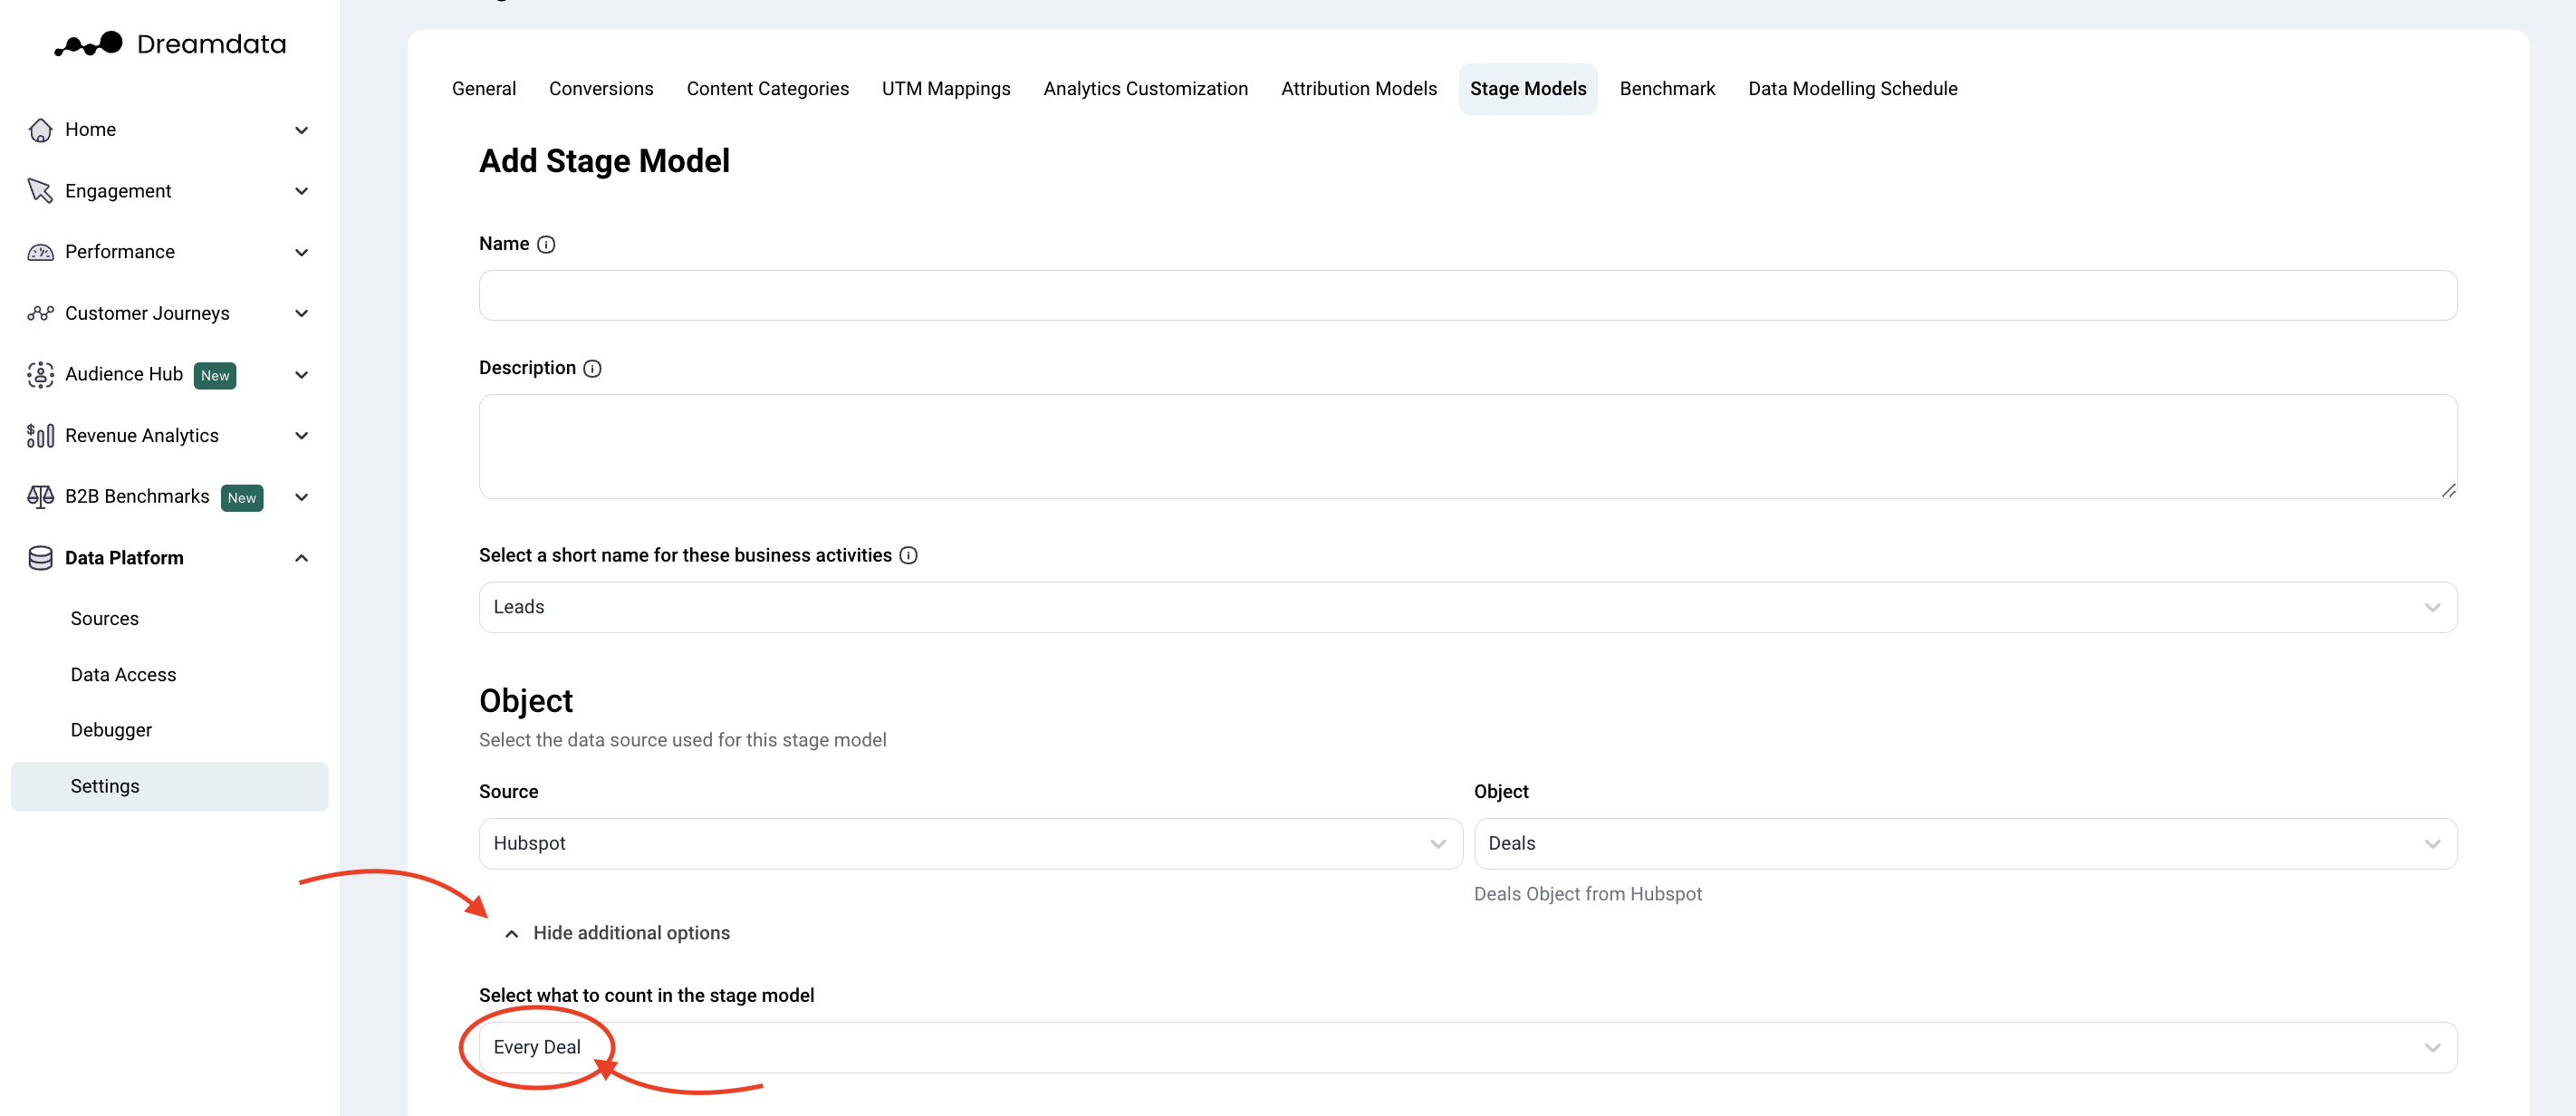 Tip: We recommend counting "every entry" on an object when building your stage models. You can further refine this with CRM filters if necessary.
Step 4: Set Criteria and Timestamps
- Deal filter
- Add filters to choose what objects are selected. The filters are based on current fields on the object of type string and boolean.
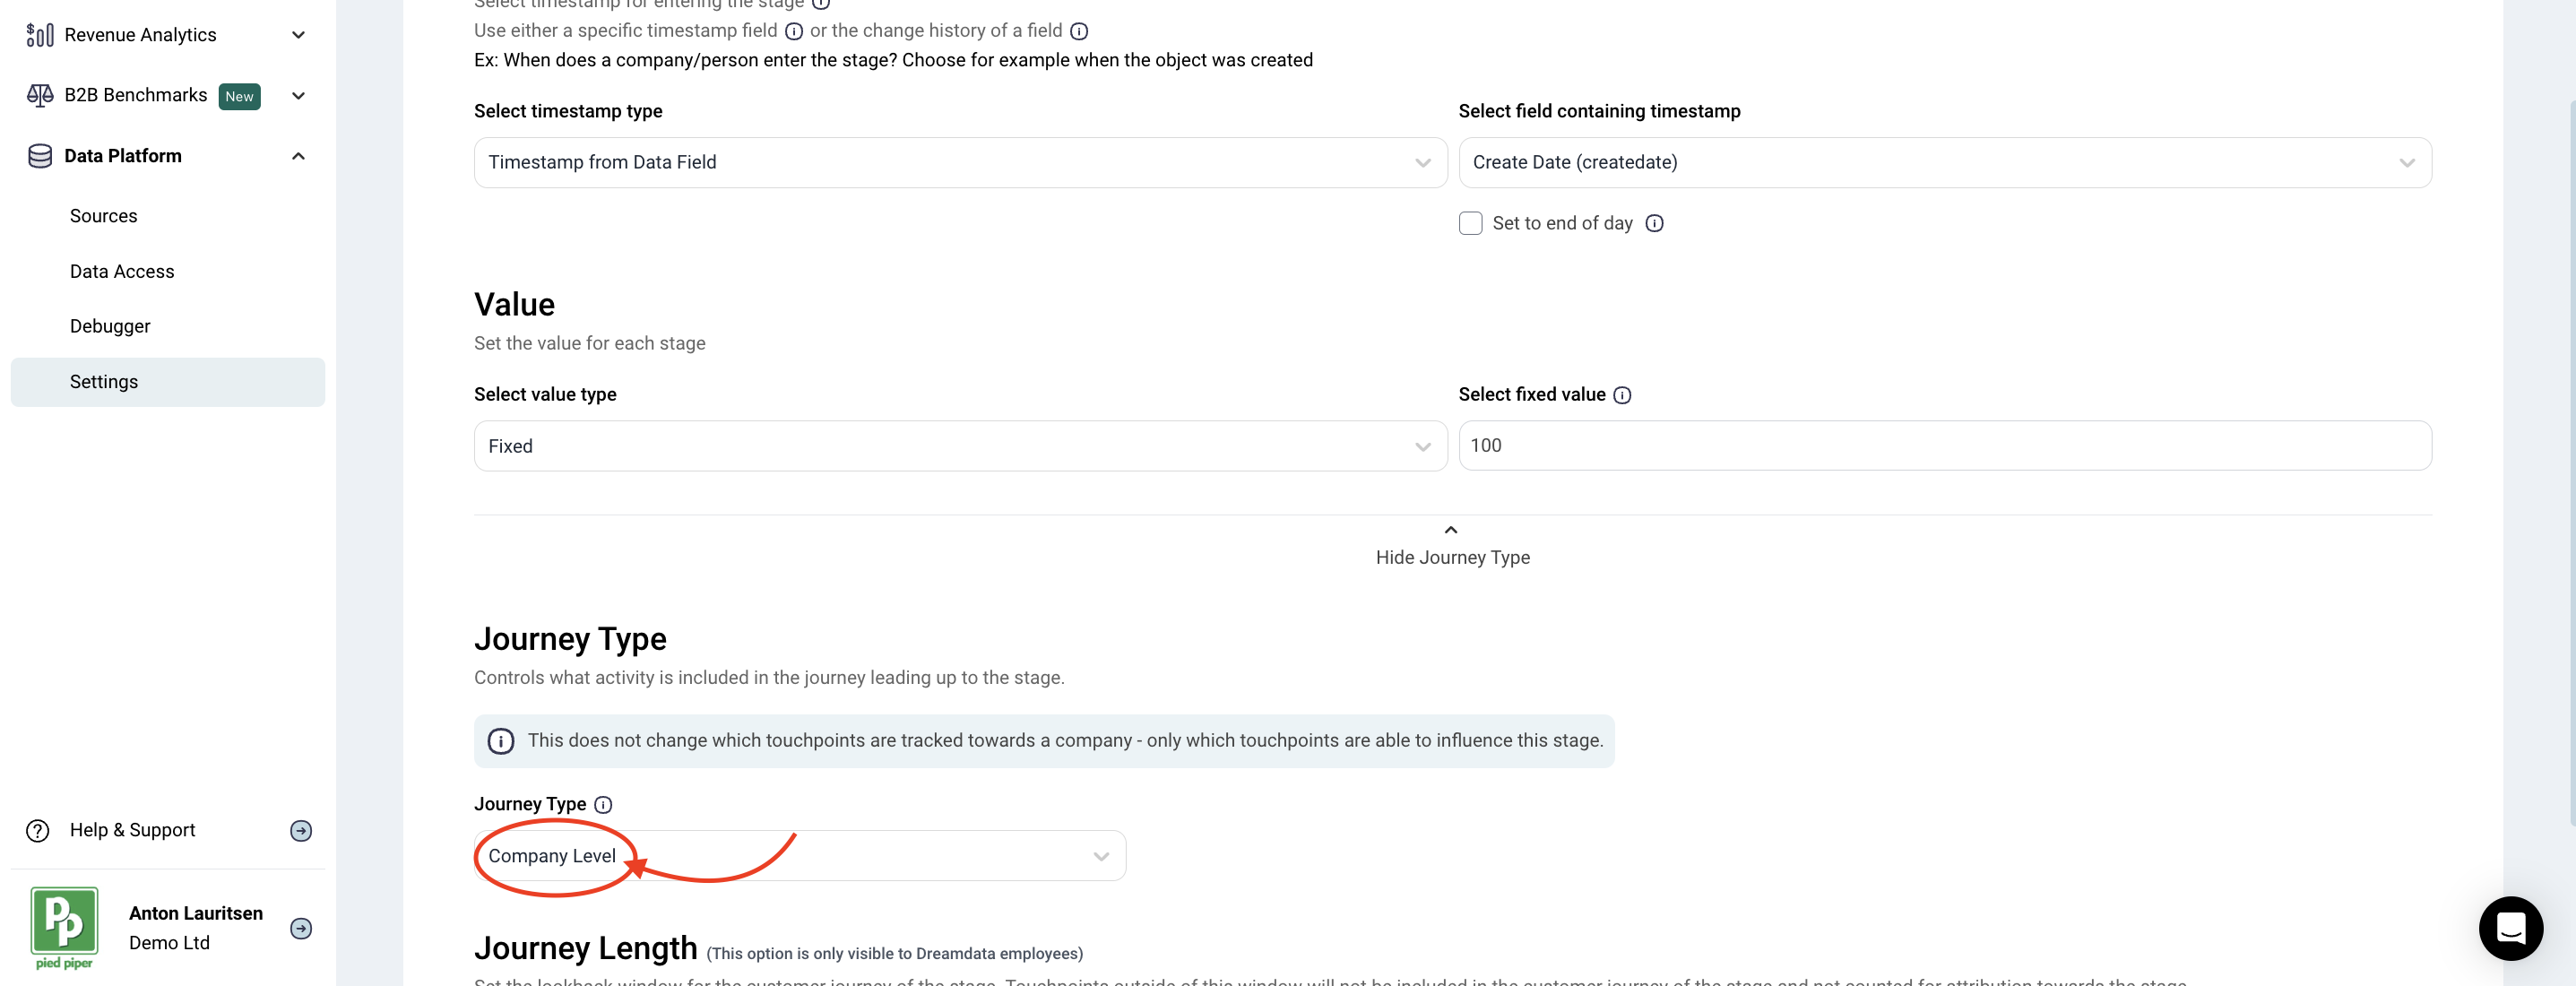
- Timestamp
- Select timestamp for entering the stage.
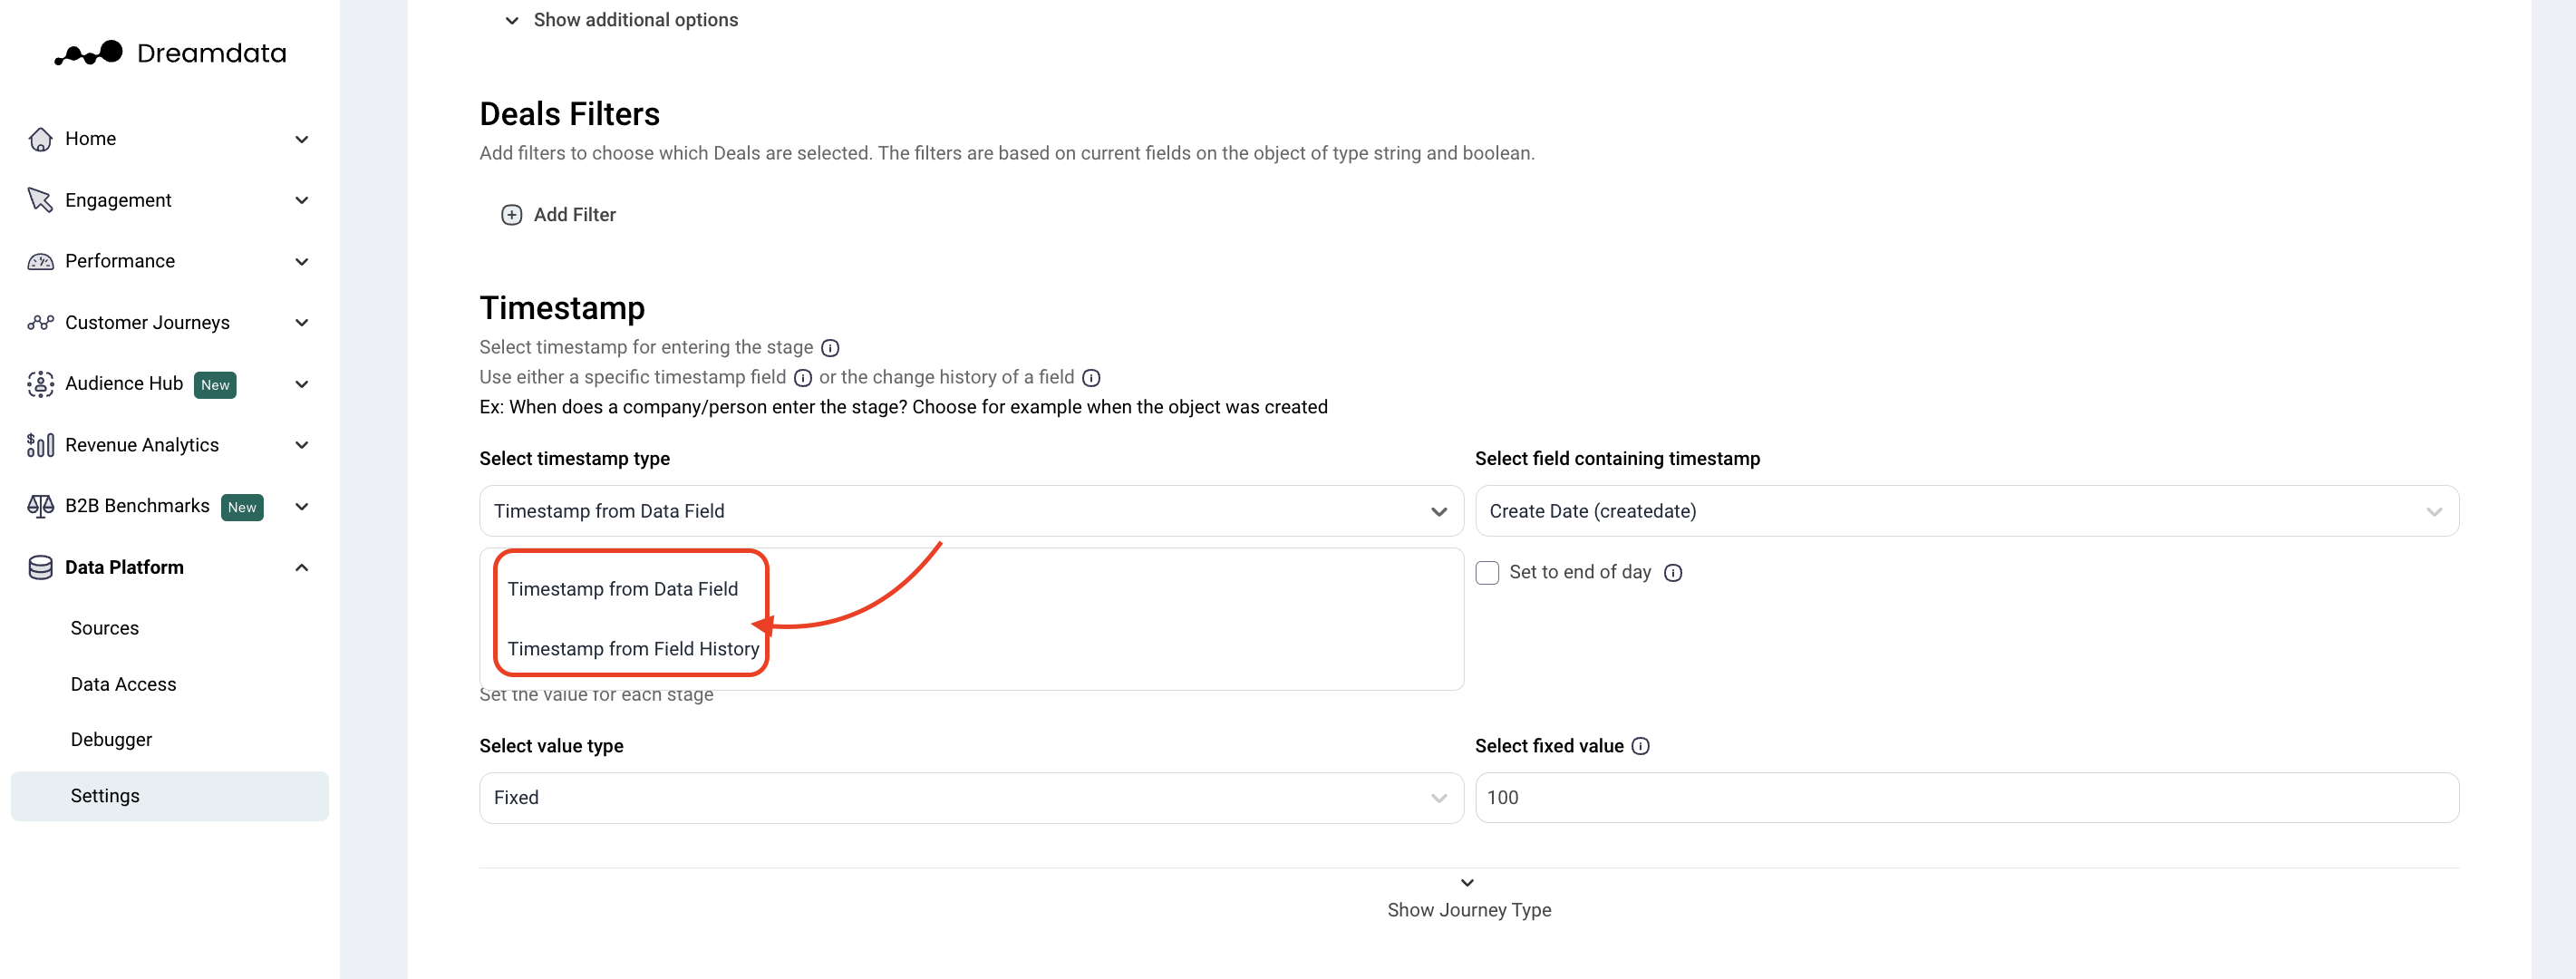
- Select timestamp for entering the stage.
- Value Assignment:
- Choose between "fixed value" or "select value from data fields".
- If there is no data field on the lead or added value, choose "Fixed." Insert the amount representing the average value for that stage.
- The value field pulls directly from the property in your CRM. Typically the amount field on a deal/opportunity.
Tip: We recommend keeping your stage models as simple and broad as possible. If you need to filter them down later, you can do this through the CRM filters. Remember, the model needs to match your final stages while maintaining simplicity. - Journey type: Define which activities should be included in the attribution.
Outlined below you'll find the different types of customer journey. Note that not every option is available for every object.
1. Contact-level attribution: Tracks only the activities of a specific object. This is ideal for stages focusing on single-person actions, like top-of-funnel stages. It does not include anonymous activities.
2. Company-level attribution includes all activities from contacts and anonymous actions associated with a company. It’s recommended for most stages to capture full account-based activity.
3. Opportunity-level attribution restricts tracking to activities of contacts connected directly to the opportunity. This is useful for large companies where tracking all activities could be misleading.
Step 5: Preview and Save
- Preview your stage models
- Press "preview results" in order to verify your results before building your data models.
- Read more about this in the Stage Model Preview article.
- Save Your Model:
- Press "Save" after you have finished configuring your stage model.
That's it! We are always here to help so please reach out to friends@dreamdata.io with any questions or requests!
Thank you!