Webhook syncs
 Updated
by
Andreea Mahu
Updated
by
Andreea Mahu
What can you do with Webhook syncs?
You can use Webhooks to send company or contact audience data to multiple tools and APIs for which we do not have a native integration yet, such as Zapier, n8n or Clay. The format the data will be shared in is JSON. You can build audiences using relevant signals in Dreamdata and sync them to the outreach tool that you use to create automated workflows to reach out to relevant companies/contacts (enrichment tools may be needed).
Data structure
The data that can be synced for each company consists of:
- Company name, domains, country, industry, number of employees and source system.
- Account owner's name and email.
- Engagement score and signals for the last 30 days, (read more about Engagement Score and Signals).
Data structure JSON - companies
{

          "metadata": {

            "message_id": "string",

            "sent_at": "timestamp",

            "audience": {

              "name": "string",

              "id": "string",

              "type": "string"

            }

          },

          "data": {

            "dd_company_id": "string",

            "domain": "string",

            "all_domains": ["string"],

            "account_owner": {

              "email": "string",

              "name": "string"

            },

            "custom_properties": {},

            "properties": {

              "name": "string",

              "country": "string",

              "industry": "string",

              "number_of_employees": "string",

              "engagement_score": "float",

              "source_system": [

                {

                  "id": "string",

                  "source": "string",

                  "object": "string"

                }

              ]

            },

            "signals": [

              {

                "names": ["signal1", "signal2"],

                "window": "last_30_days"

              }

            ]

          }

          }
The data that can be synced for each contact consists of:
- Contact's name and last name, email, country, title, role, seniority, phone number.
- Companies the contact belongs to.
Data structure JSON - contacts
{

          "metadata": {

            "message_id": "string",

            "sent_at": "timestamp",

            "audience": {

              "name": "string",

              "id": "string",

              "type": "string"

            }

          },

          "data": {

            "dd_contact_id": "string",

            "email": "string",

            "custom_properties": {},

            "properties": {

              "additional_emails": ["string"],

              "first_name": "string",

              "country": "string",

              "last_name": "string",

              "name": "string",

              "is_corporate_email": boolean,

              "is_from_primary_crm": boolean,

              "phone_number": "string",

              "role": "string",

              "seniority": "string",

              "title": "string",

            },

           "companies": {

              "dd_company_id": "string",

              "domain": "string",

              "is_primary_company": "string",

              "name": "string",

            },

           "source_system": [

                {

                  "id": "string",

                  "source": "string",

                  "object": "string"

                }

              ]

          }

          }
How to set up Webhooks?
- On Dreamdata's main menu, navigate to Activation Hub -> Syncs and select Webhooks.
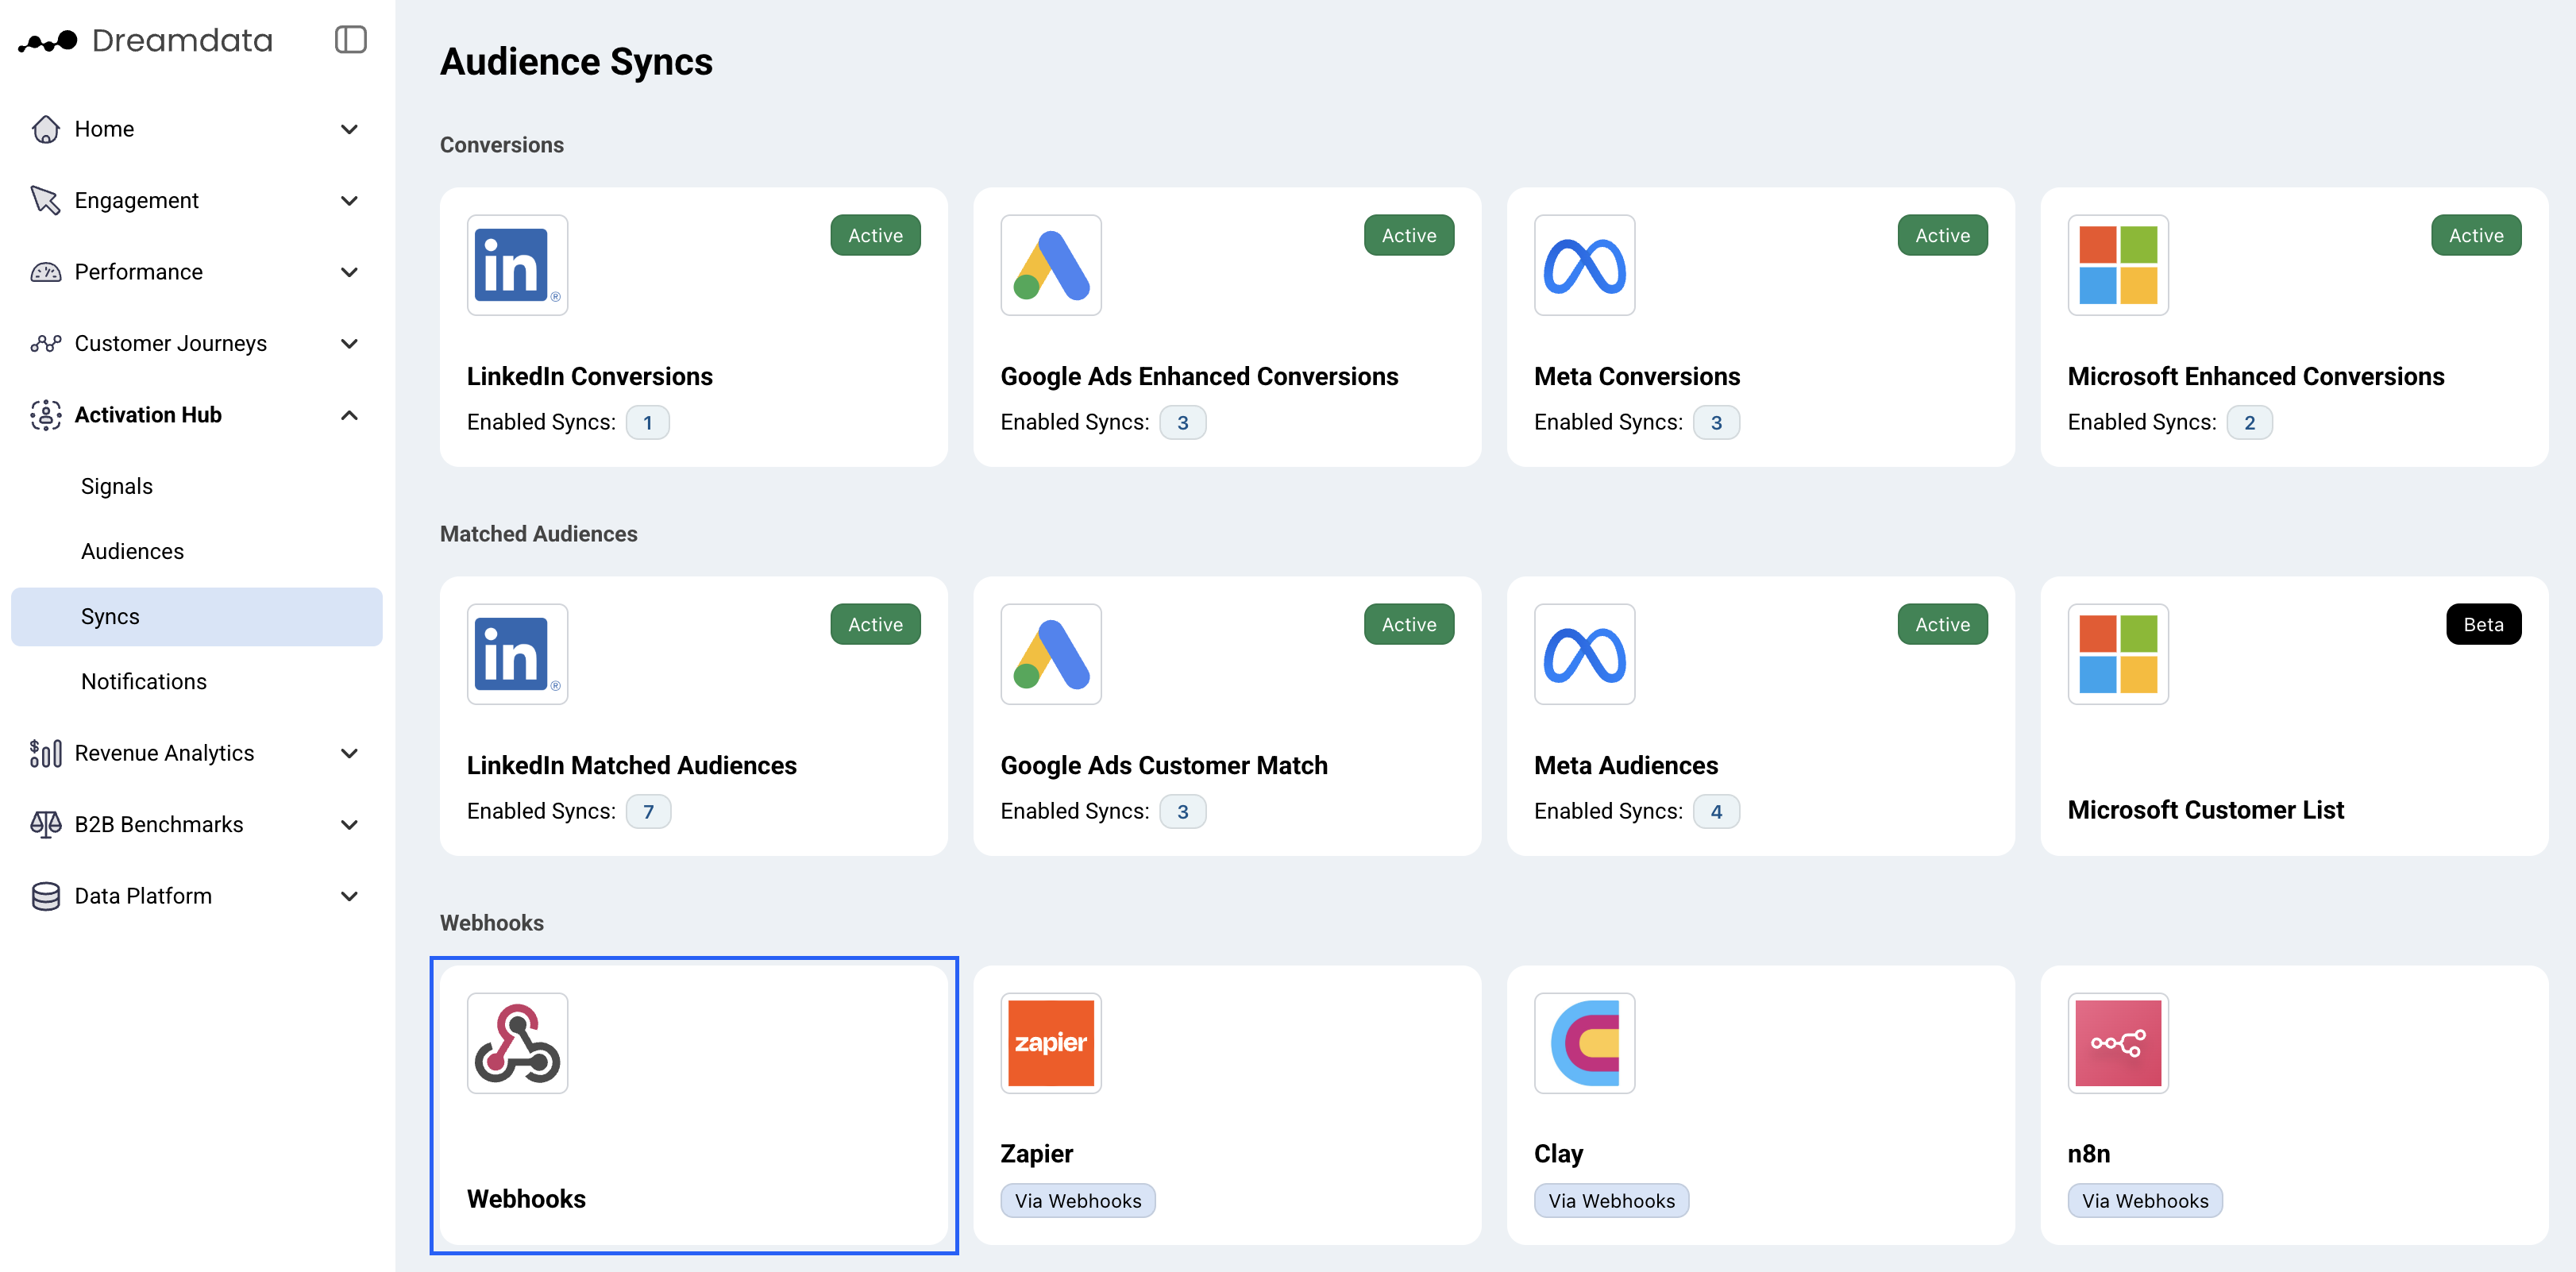
- Click the Add new button to start creating a Webhook connection.
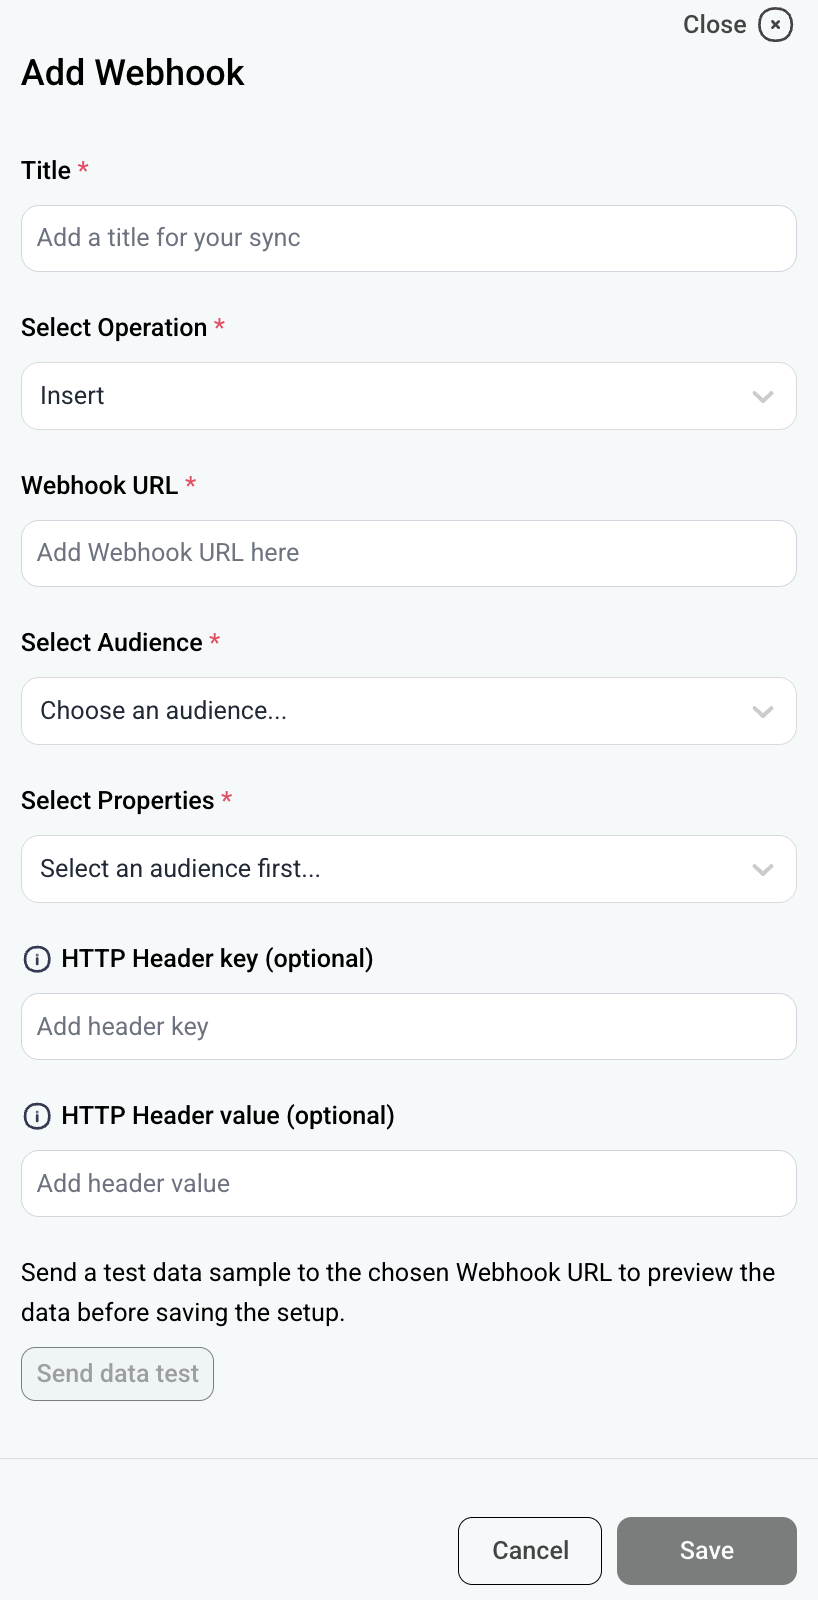
- Choose a title for your sync.
- You can choose between two available operations, Insert or Upsert. After the initial sync, which includes all existing records:
- Insert will only sync new contacts/companies
- Upsert will sync all property updates for all contacts/companies.
- Add the URL for the Webhook you want to use.
- Select the audience (companies or contacts) that you want to sync.
- Select the audience's properties (you can choose more than one property).
- Finally, click Save after you filled in the configuration.
- You will be able to see a list with all your saved Webhook syncs and some properties. In this view, you can disable, enable, edit and delete syncs:

You're all set 🔥 All existing data from the selected audience will be synced immediately. Following each data modeling run, data will be automatically synced daily, for any additions in the selected audience.
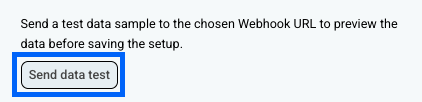
Test your Webhook connection
If you want to test the connection click the Send data test button after populating the mandatory fields in the configuration. You will receive one company or contact record in the selected Webhook URL.
Send Audience data to Zapier
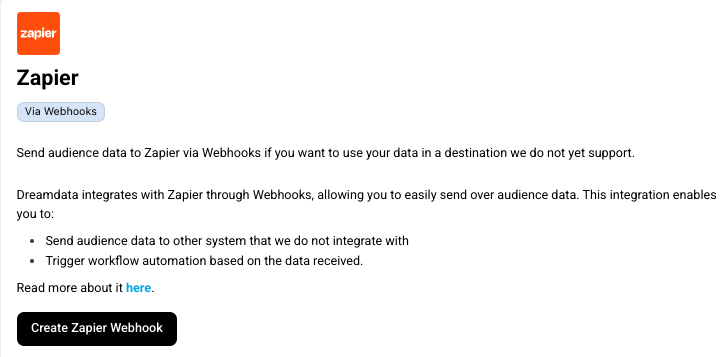
Dreamdata integrates with Zapier through Webhooks, allowing you to easily send over this audience data. This integration enables you to send audience data to other system that we do not integrate with and trigger workflow automation based on the data received.
Zapier Setup required
- Login to Zapier
- You need an active account.
- Create a Zap.
- Use “Webhook by Zapier” as the trigger.
- Use “Catch Hook” as the trigger event.
- Find the Webhook URL.
- Create a Webhook connection in Dreamdata - through the Zapier page or Webhooks
- Copy the Webhook URL from Zapier.
- Paste the URL into the Dreamdata webhook configurator.
- Test the connection using the “Send data test” button.
- Save your setup.
Send Audience data to Clay
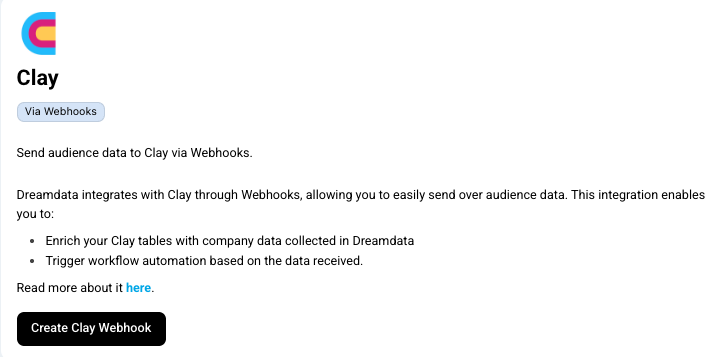
Dreamdata integrates with Clay through Webhooks, allowing you to easily send over audience data. This integration enables you to enrich your Clay tables with company or contact data collected in Dreamdata and trigger workflow automation based on the data received.
Setup required
- Login to Clay
- You need an account with Webhook functionality.
- Create a Webhook by following this guide.
- Find the Webhook URL.
- Create a Webhook connection in Dreamdata - through the Clay page or Webhooks
- Copy the Webhook URL from Clay.
- Paste the URL into the Dreamdata Webhook configurator.
- Test the connection using the “Send data test” button.
- Save your setup.
Send Audience data to n8n
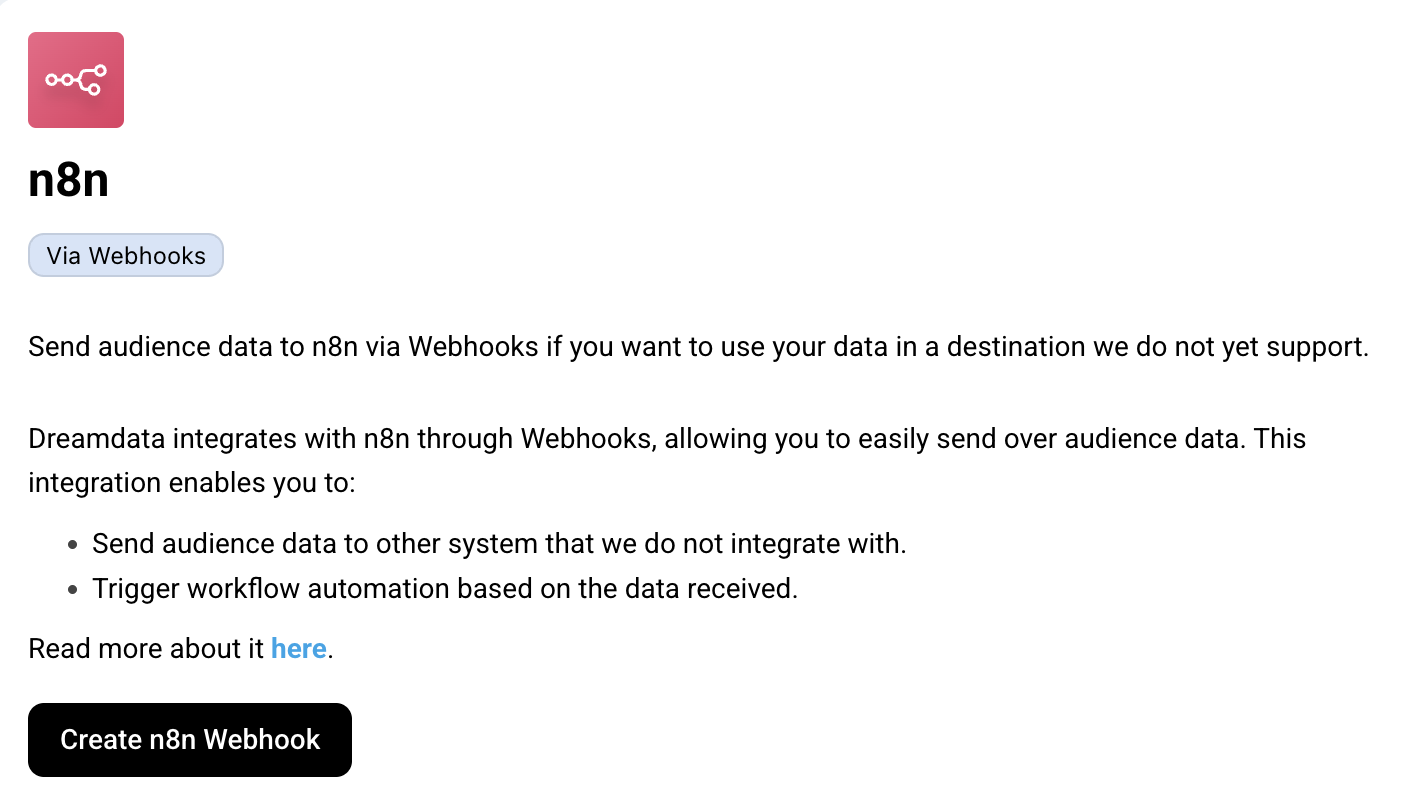
Dreamdata integrates with n8n through Webhooks, allowing you to easily send over audience data. This integration enables you to send audience data to other system that we do not integrate with trigger workflow automation based on the data received
Setup required
- Login to n8n
- You need an active account.
- Create a Webhook node by following this n8n guide.
- Find the Production Webhook URL.
- Create a Webhook connection in Dreamdata - through the n8n page or Webhooks
- Copy the Webhook URL from n8n.
- Paste the URL into the Dreamdata Webhook configurator.
- Test the connection using the “Send data test” button.
- Save your setup.
Webhook security
When we send you information (like a message or data) we include a special "signature", which can be seen as a "secret handshake". This signature proves the message really came from us and that nobody changed it on its way to you.
What is a Signature?
Imagine you and your friend have a secret code. When you send a message, you use this secret code to create a special stamp that only you and your friend know how to make.
When your friend receives the message, they can look at the stamp and know two things:
- The message is definitely from you (because only you have the secret code).
- The message wasn't opened or changed by anyone else.
Our signature works just like that special stamp.
How do we create the signature?
We use a standard method called HMAC (Hash-based Message Authentication Code). This process takes the message and a secret key (that only you and we know) to create the unique signature.
How to Verify the Signature
If you want to verify the message is authentic, you will need to follow the steps we did to create the signature and see if you get the same result.
Here are the exact steps:
- Get the message and the signature: When we send you data, we'll send the message itself and the signature as a separate piece of information (usually in the request headers).
- Use your secret signing key: You find your signing key under the actions menu for each webhook sync created.
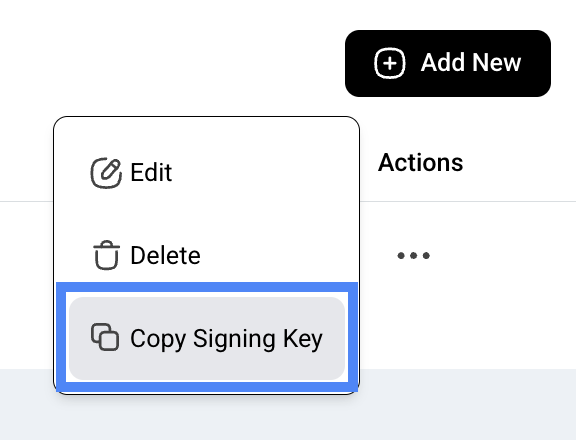
- Create your own signature: Use the exact same message data and your secret signing key to create a new signature using the HMAC method. All common programming languages have libraries to do this.
- Compare the signatures: Compare the signature you created with the one you received with the message.
- If they match, you can trust the message is from us and hasn't been tampered with.
- If they do not match, you should ignore the message because it might be from an imposter or it might have been changed.
This process ensures that the data you receive is secure and trustworthy.
Example code to verify the Signature
Below you will find a few examples of functions which you can use to validate the signature in different programming languages.
JavaScript
/**
 * Verifies an HMAC-SHA256 signature against a received signature, mirroring
 * the Go signer's logic (HMAC-SHA256, Base64 encoding).
 * @param {string} secret The secret key.
 * @param {string} body The raw, utf-8 string request body.
 * @param {string} receivedSignature The signature received in the request header.
 * @returns {boolean} True if the signature is valid, false otherwise.
 */
function verifySignature(secret, body, receivedSignature) {
    if (!secret) {
        // If the original signer skipped the signature, we treat it as verified.
        return true;
    }

    // 1. Calculate the expected signature
    const hmac = crypto.createHmac('sha256', secret);
    // Use 'utf8' encoding to match how most webhooks send data and how the
    // Go function reads the io.Reader body.
    hmac.update(body, 'utf8');

    // 2. Get the Base64 encoded signature
    const expectedSignature = hmac.digest('base64');

    // 3. Compare the signatures securely
    // We use a timing-safe buffer comparison to prevent potential timing attacks.
    try {
        const expectedBuffer = Buffer.from(expectedSignature, 'utf8');
        const receivedBuffer = Buffer.from(receivedSignature, 'utf8');
        return crypto.timingSafeEqual(expectedBuffer, receivedBuffer);
    } catch (e) {
        // Handle cases where the buffers might have different lengths for timingSafeEqual
        return expectedSignature === receivedSignature;
    }
}
Python
import hmac
import hashlib
import base64


def verify_signature(secret: str, body: bytes, received_signature: str) -> bool:
    """
    Verifies an HMAC-SHA256 signature against a received signature, matching the Go signer's logic.

    :param secret: The secret key (string).
    :param body: The raw request body (bytes).
    :param received_signature: The signature received in the request header (string).
    :return: True if the signature is valid, False otherwise.
    """
    if not secret:
        # If the original Go signer function skipped the signature, we return True.
        return True

    # 1. Calculate the expected signature (HMAC-SHA256)
    # key must be bytes, msg must be bytes
    hashed = hmac.new(key=secret.encode("utf-8"), msg=body, digestmod=hashlib.sha256)

    # 2. Get the Base64 encoded signature
    # b64encode converts to Base64 bytes, then .decode() converts to a string.
    expected_signature = base64.b64encode(hashed.digest()).decode("utf-8")

    # 3. Compare the signatures in a timing-safe manner
    return hmac.compare_digest(expected_signature, received_signature)
Golang
package main

import (
	"crypto/hmac"
	"crypto/sha256"
	"crypto/subtle"
	"encoding/base64"
	"errors"
)

// Setting is a mock struct to hold the secret, mimicking the original Go function's parameter.
type Setting struct {
	Secret string
}

// VerifySignature calculates the expected HMAC-SHA256 signature from the body
// and compares it against the received signature in a timing-safe manner.
func VerifySignature(setting Setting, bodyBytes []byte, receivedSignature string) error {
	// Skipping verification if no secret is configured (matching the signer's logic)
	if setting.Secret == "" {
		return nil
	}

	// 1. Calculate the expected signature
	hasher := hmac.New(sha256.New, []byte(setting.Secret))
	hasher.Write(bodyBytes)

	// Base64 encode the resulting hash bytes
	expectedSignature := base64.StdEncoding.EncodeToString(hasher.Sum(nil))

	// 2. Compare the signatures using ConstantTimeCompare for security
	expectedBytes := []byte(expectedSignature)
	receivedBytes := []byte(receivedSignature)

	// Check if lengths are equal first to prevent a panic in ConstantTimeCompare if lengths differ
	if len(expectedBytes) != len(receivedBytes) {
		return errors.New("signature verification failed: length mismatch")
	}

	// ConstantTimeCompare returns 1 if the two byte slices are equal, 0 otherwise.
	if subtle.ConstantTimeCompare(expectedBytes, receivedBytes) == 1 {
		return nil // Signatures match
	}

	return errors.New("signature verification failed: signatures do not match")
}