Form tracking: Google Tag Manager (auto-identify script)

In this article, we'll show you how to set up your form tracking using Google Tag Manager through auto-identify script.
Adding Google Tag Manager via auto-identify script
We recommend that you do two separate custom tags.
One for tracking forms (as shown below) and one for web tracking (find web tracking guide here).
- To install the auto-identify form tracking script using Google Tag Manager start by opening up Google Tag Manager.
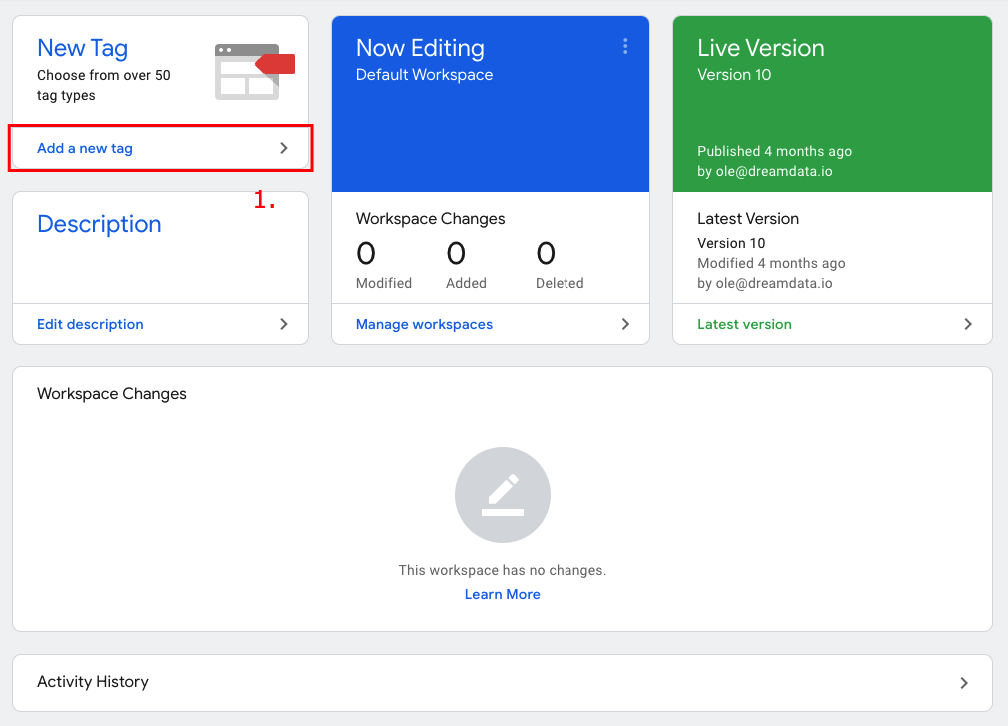
- Click on 'Add a new tag'.

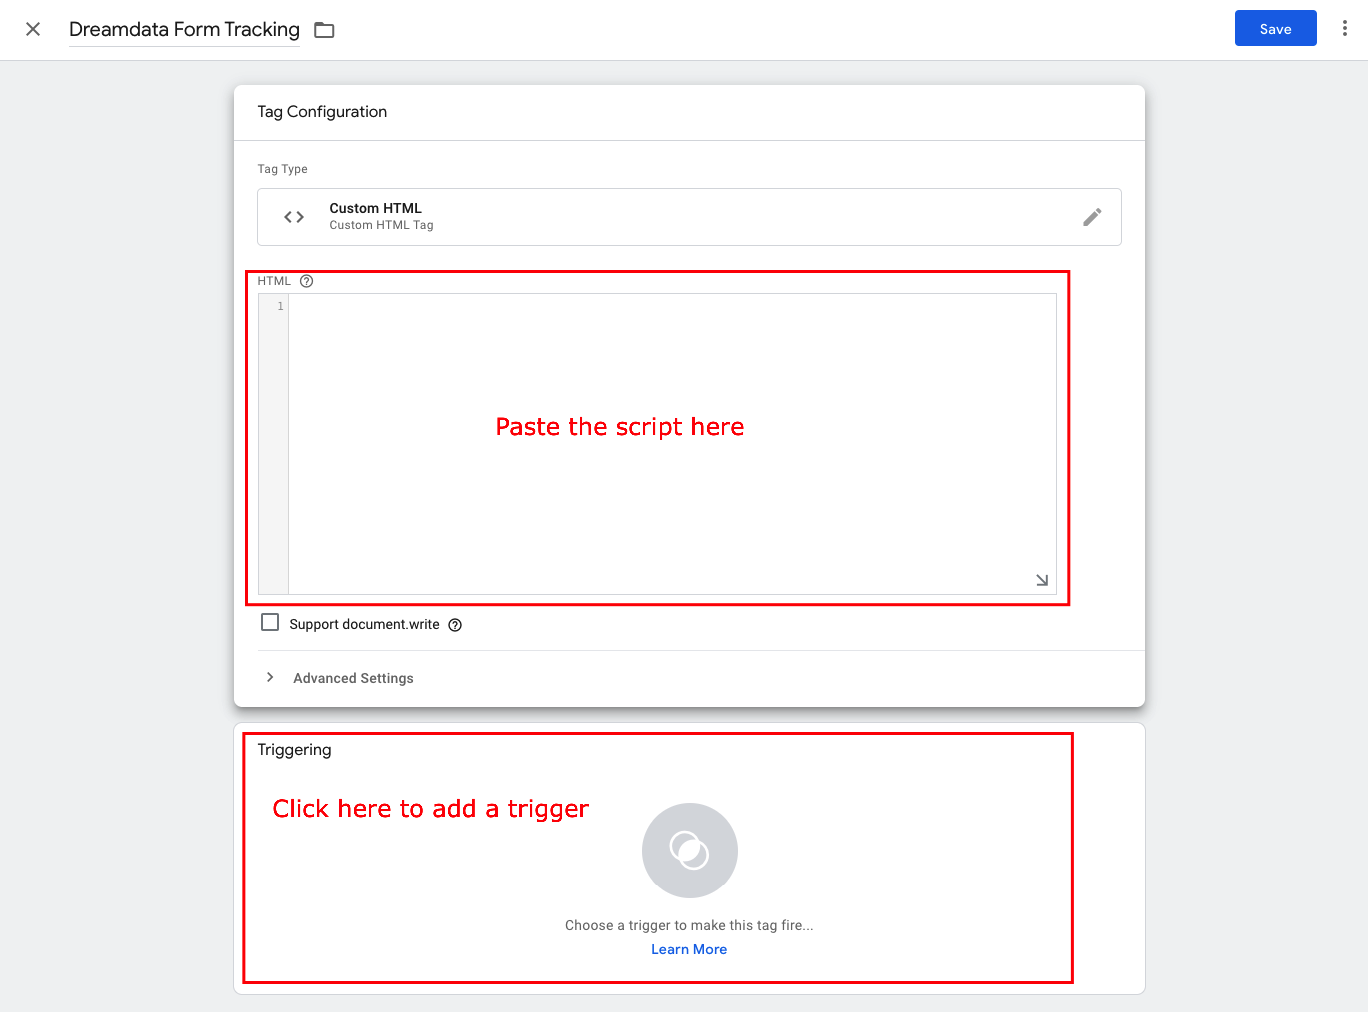
- Name the tag in the top left corner e.g. 'Dreamdata Form Tracking' and then click on 'Tag Configurations'.
- Pick 'Custom HTML' from the list under the header 'Custom'.
- Copy the script below: Paste in this script as showed in the image below:
<script async id="dreamdata-form-identify" src="https://cdn.dreamdata.cloud/scripts/identify-form/v1/identify-form.min.js"></script>
- If you are using Hubspot Forms, please apply the below script instead:
<script>
var script = document.createElement('script');
script.async = 'true';
script.id = 'dreamdata-form-identify';
script.src = "https://cdn.dreamdata.cloud/scripts/identify-form/v1/identify-form.min.js";
script.setAttribute('data-hubspot-forms', 'true');
document.head.appendChild(script);
</script> - Paste in this script as showed in the image below:

- Now click on 'Triggering' just below from where you added the script and pick all pages as a trigger.

- Click 'Save' in the top right corner.
- The last thing you need is to submit the tag to your workspace by clicking 'Submit' in the top right corner of the home screen:

- The tag will now immediately start firing.
- Test if you have submitted the script correctly by filling in a form on your website.
- Then go to the Dreamdata app and click Engagement -> Real-Time.
If the script was added correctly, you should see the form you just submitted after 3 minutes.
